
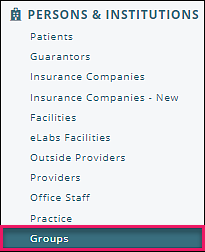
From the navigation menu, select Persons and Institutions | Groups to access the "Groups" page to add and update information, or remove a patient for a group.
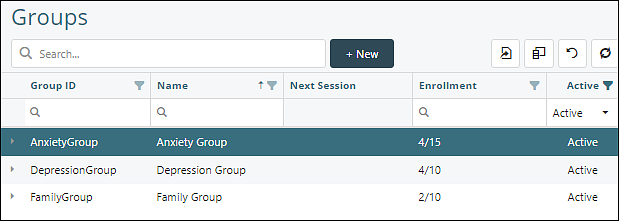
This page contains a list of groups (once created) and is where attendance and enrollment information is stored and can be updated. Groups can be searched by "Group ID" or "Name" to quickly lookup a specific group. Each column can be filtered, and the order in which the columns appear can be changed by dragging and dropping the heading. The "Enrollment" column will show the current enrollees/total allowed enrollees.
Click the arrow to the left of a Group to see all future appointments scheduled for that Group.
Add a Group
- Click the +New button
- Add Group ID, Name and Maximum Size
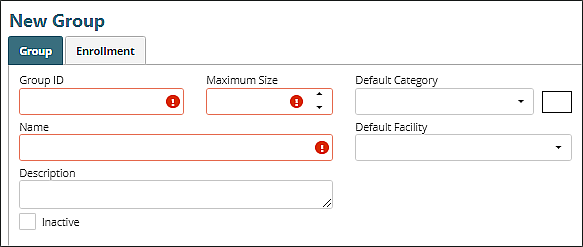
- Optionally add a Description, Default Category and Default Facility
- Click Save. The Attendance Settings and History tabs will appear

Complete Attendance Settings
Add Attendance Settings to set which options are available when taking attendance for the group (e.g., “Present,” “No-show,” etc.), and to map those statuses to the transaction and note template that apply to enrollees marked with that attendance status.
The Attendance Settings tab is populated with default statuses. Update or inactivate a default status by clicking on it from the list or add a custom status with the +Add button. A Primary Code is required for each status before attendance can be recorded for the group.

- Select a Primary Code (and if applicable, Add-On Codes) to be populated when attendance is recorded for patients with this Attendance Status (The following image illustrates the result of clicking +Add and also demonstrates the additional fields available when adding a code to a default status.)
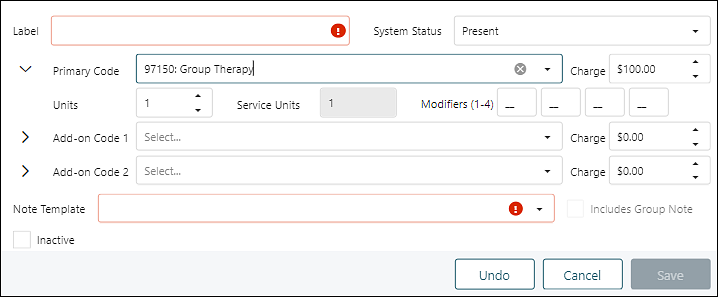
- Add dollar amount in Charge Field
- Select a Note Template
- Check the box to ‘Include Group Note’ if Group-level content should be included in clinical notes created for patients with this Attendance Status
- Click Save
Note: If holding a hybrid group, it is suggested to create a Present (in person) and Present (virtual or telehealth) status.
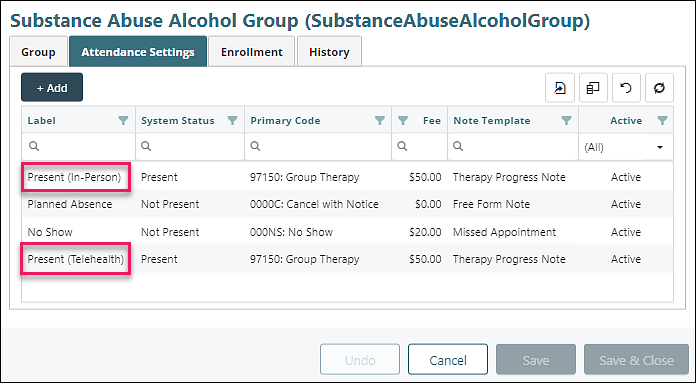
Note: Attendance Settings must be complete in order to bill for a group.
Enroll Patients in the Group
- Select a patient from the searchable dropdown list
- Click +Add
- Optionally, add a start date and end date to set a date range for the patient’s active enrollment in the Group

To edit the start or end date, click in that box and enter a date.
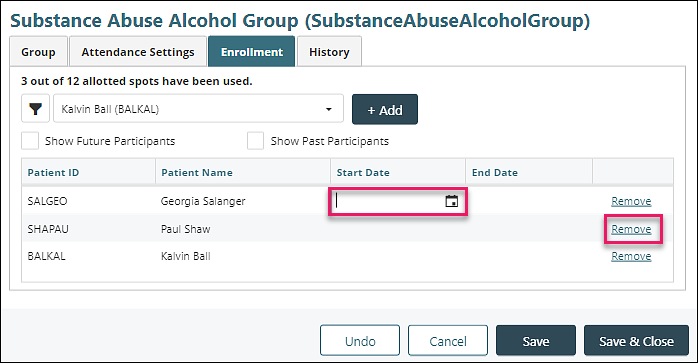
Click the link on the far right to ’Remove’ a patient from the group.
Alternately, adding an End Date will remove the patient from the group for any future appointments.