
Setting up and managing patients’ MYIO accounts is described in the sections of this article.
Set Up
Existing Patient
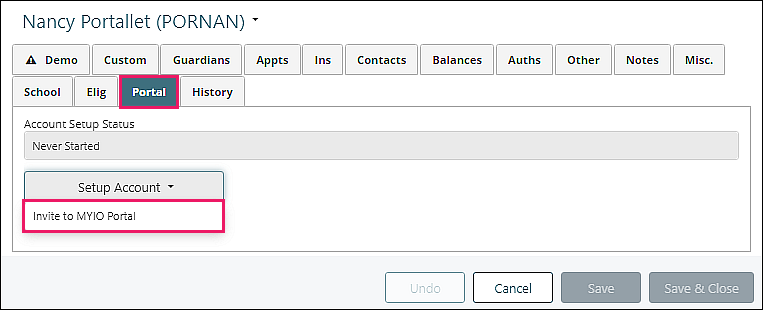
For individual patient account setup, click on Portal tab from Persons & Institutions | Patients | select Patient, click Invite to MYIO Portal from Setup Account drop-down list in the Portal tab.

Multiple patient account setup can be accomplished through the Patient Communications Automated MYIO Portal Onboarding Reminder.
New Patient
Click on Portal tab, click Invite to MYIO Portal from Setup Account drop-down list
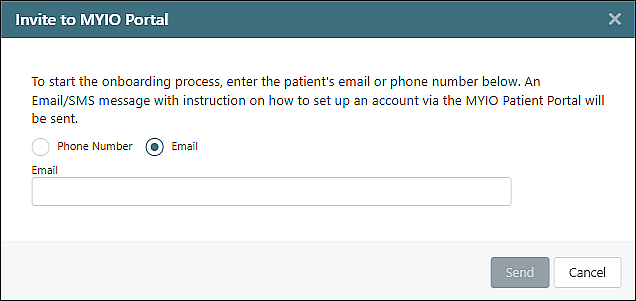
Enter phone or email address in "Invite to MYIO Portal" window, then click Send
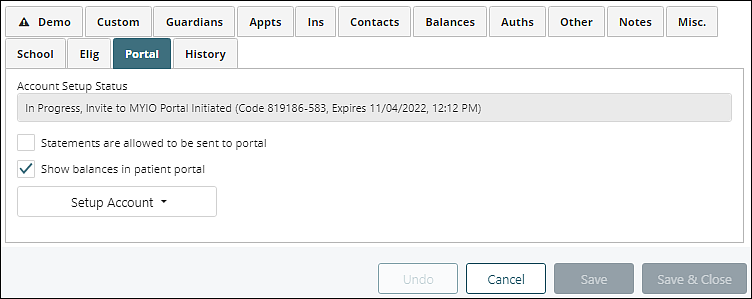
There will be a green success banner briefly displayed and new information will show
The patient will receive an email with instructions to use access code to create an account
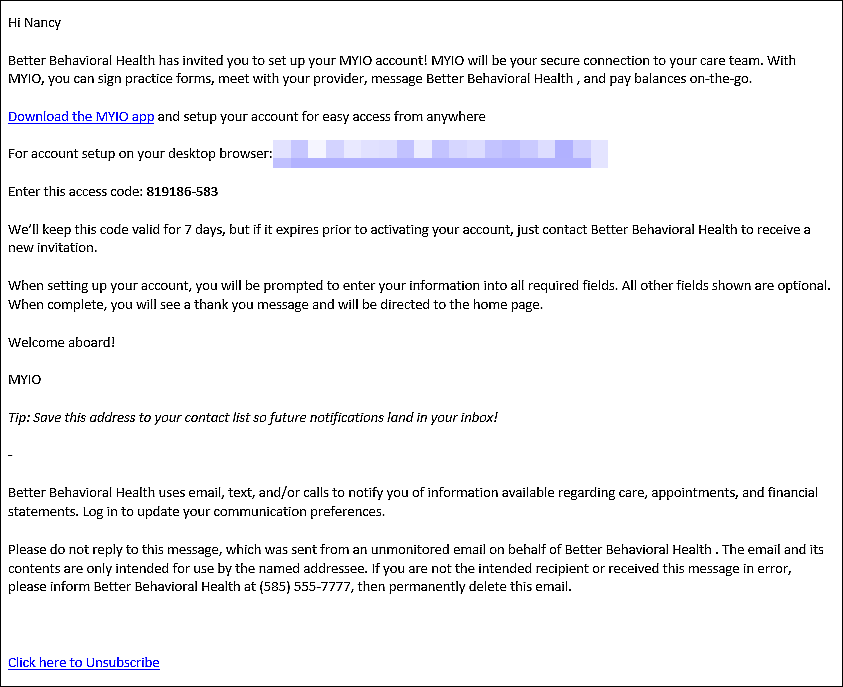
Once the patient’s MYIO account is activated, the patient completes the onboarding process
DeletePersons & Institutions | Practice | Patient Portal Tab
The options in the Patient Portal tab in Persons & Institutions | Practice allow customization of information in MYIO.
Navigate to Persons & Institutions | Practice | Patient Portal tab
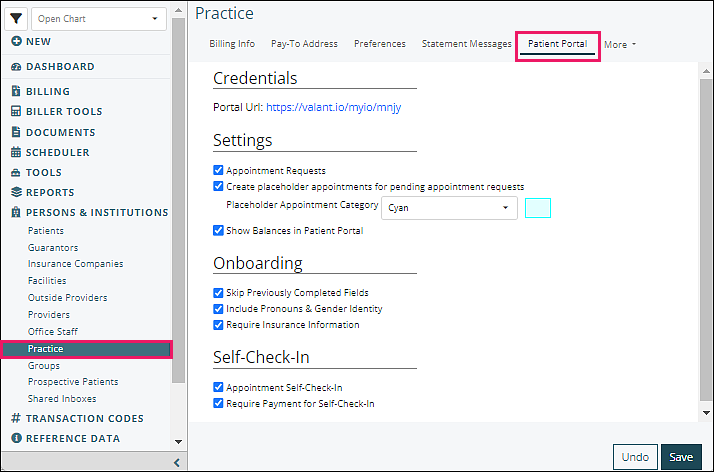
Credentials
Portal Url: unique to each practice for browser access to MYIO
Settings
- Appointment Requests
- Create placeholder appointments
- Show Balances in Patient Portal
Onboarding
- Skip Previously Completed Fields: if checked, auto-skips fields in MYIO onboarding when they are already filled in the patient record
- Include Pronouns & Gender Identity: if checked, shows these fields in MYIO onboarding
- Require Credit Card Information: if checked, shows these fields in MYIO onboarding
- Require Insurance Information: if checked, shows these fields in MYIO onboarding
Self-Check-In
- Appointment Self-Check-In
- Require Payment for Self-Check-In
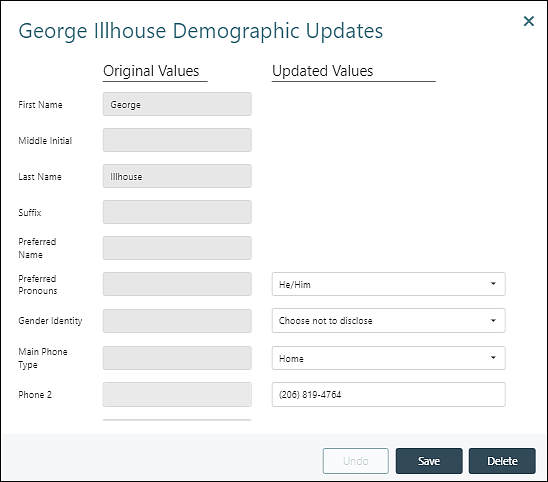
Demographic Updates Queue
The Demographic Updates Queue lists the changes that patients have submitted via MYIO. To prevent incorrect information from being entered by mistake or otherwise, the practice needs to verify the information given by the patient. Once demographic updates are saved, they may be found in Persons & Institutions | Patients | select patient | Demo tab. Once insurance updates are saved, they may be found in Persons & Institutions | Patients | select patient | Ins tab.
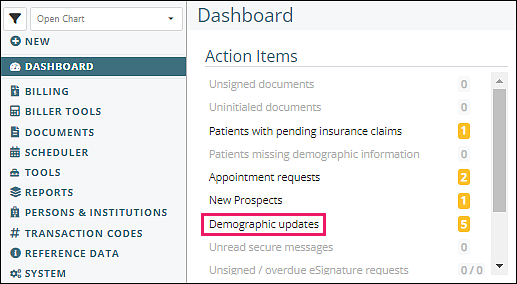
Accessing the Demographic Updates Queue
Click Demographic updates from Dashboard | Action Items
OR Navigate to Tools | Demographic Updates Queue from the left menu
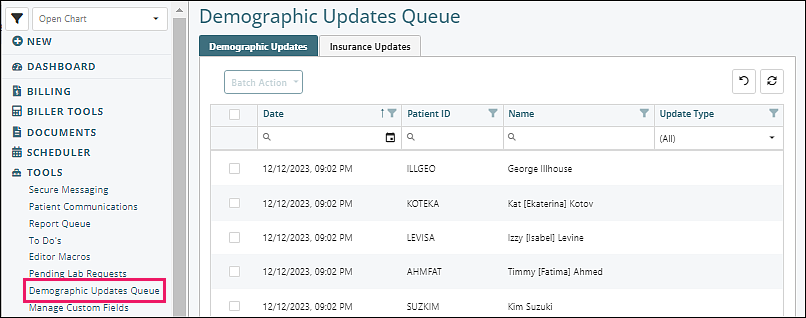
Table Navigation Tips
Top right icons:
| Removes all filters that have been set for any field | |
 |
Refreshes data if any changes were made |
Column Filtering Tools:
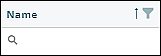
- Filter Icon: Click on icon and check boxes to display selected column data, click OK to save filtered selections
- Reorder arrow: If clicked, updates list order to ascending or descending
- Search Icon Field: Type in text to select specific column data
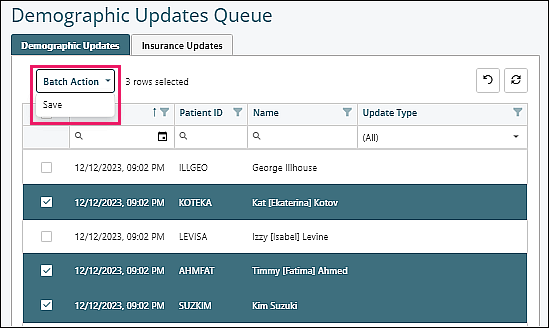
Demographics Updates Tab
Displays list of patients who submitted updates through MYIO.

Columns:
- Selection checkboxes: click header checkbox to select all
- Date
- Patient ID
- Name
- Update Type
Saving Submitted Demographic Updates
Individual
Click on a row, review "Updated Values", click Save
Batch action
Click top checkbox to select all, or click boxes to the left of individual rows
Click Save from "Batch Action" drop down
Insurance Updates Tab
Displays list of patients who submitted insurance updates through MYIO.
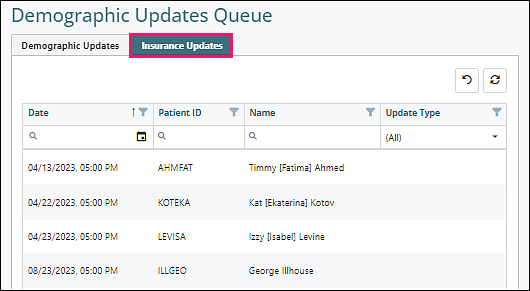
Columns:
- Date
- Patient ID
- Name
- Update Type
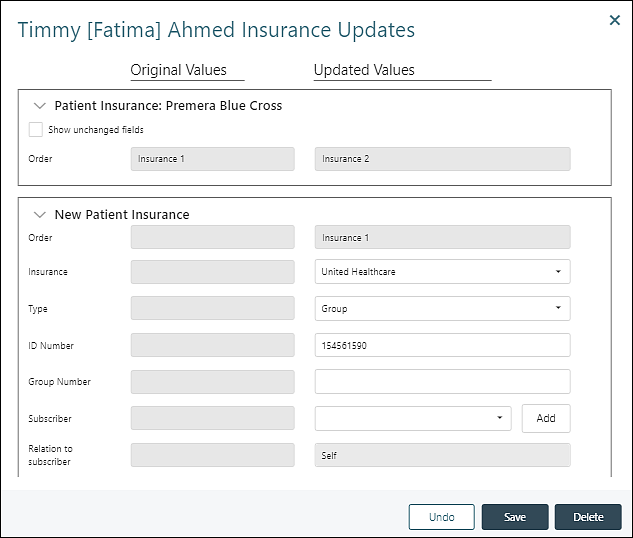
Saving Submitted Insurance Updates
Click on a row, review update submissions, select insurance "Type" from drop down list, click Save
Manage Accounts
Navigate to Persons & Institutions | Patients | select patient | Portal tab
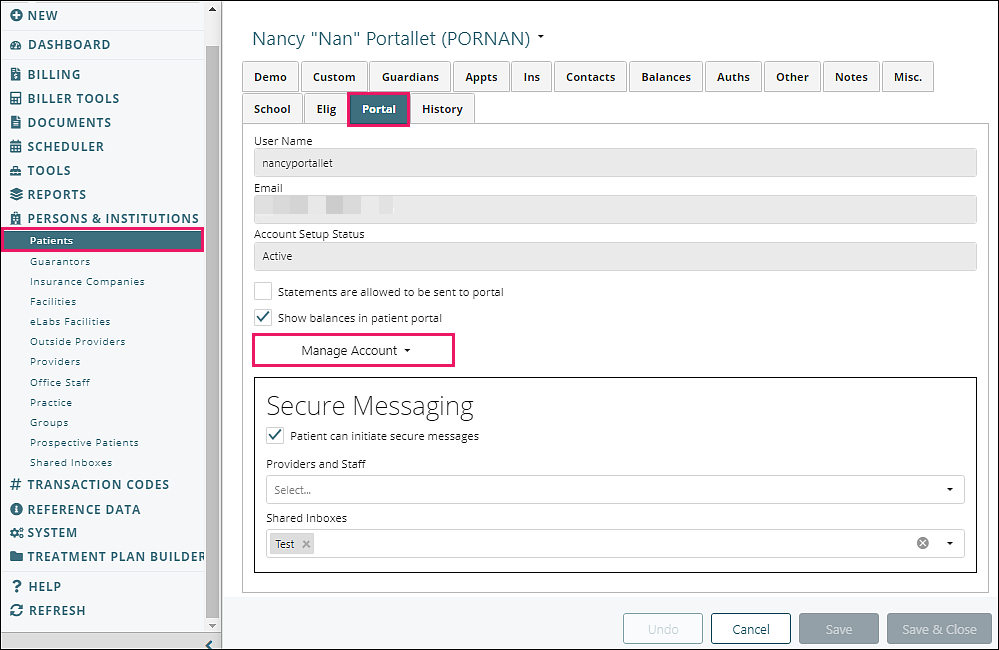
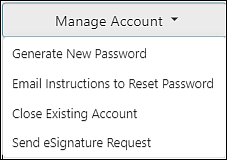
The "Manage Account" drop-down list allows the practice to:
- Generate a new password for a patient (automatically unlocks the account)
- Email instructions to reset a password (patient is sent link to update their password)
- Close an existing account (deactivating the account)
- The Patient Portal Account setup warning will appear. Click Yes to deactivate the account
- The Patient Portal Account Confirmation Box will appear, click OK
- Send eSignature Request
Note: A patient MYIO account is locked when the patient incorrectly enters user name or password five times. The patient can wait 15 minutes for the account to unlock, or contact the practice to reset the password. The practice would use the "Generate New Password" option in this situation. The "Email Instructions to Reset Password" option will not bypass the locked account.
Delete