
Practices can upload documents for patients to access through their MYIO accounts. In order to have a document appear in MYIO users should use the "Patient Portal Forms" Document Type on the Practice Documents page. This will cause the document to appear on the "Resources" section for all patients when they log in to MYIO.
Note: "Resources" are available in all MYIO accounts, practices should never use the "Patient Portal Forms" Document Type to upload any information containing Protected Health Information. Also, Resources appear in MYIO as soon as they are uploaded to Practice Documents. They do not need to be signed to appear in MYIO.
Sending Measures in MYIO
Valant allows measures to be assigned and completed by patients with a MYIO account. This allows patients to fill out measures before an appointment. There are two different measurements: Scheduled Measures and One-Time Measures. Scheduled Measures are sent on a recurring basis to MYIO two days before a patient has an appointment. One-Time Measures are assigned once. One-Time Measures can be assigned from the Scheduler or from the Patient’s Chart.
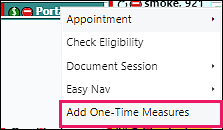
To Schedule a One-Time Measure from the Calendar:
- Right click on the Appointment
- Click Add One-Time Measures
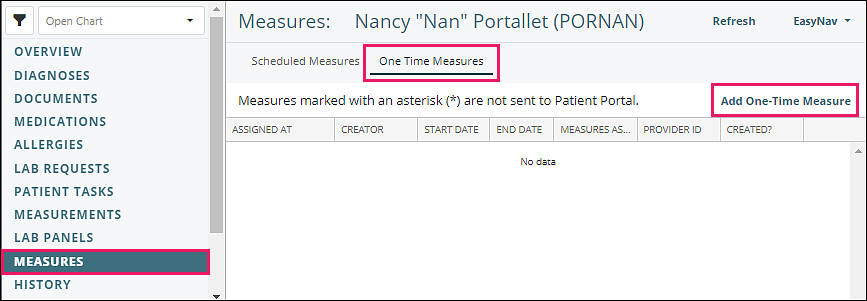
To schedule a One-Time Measure from the Patient Chart:
- Open patient chart
- Navigate to Measures | One Time Measures tab | Add One-Time Measure
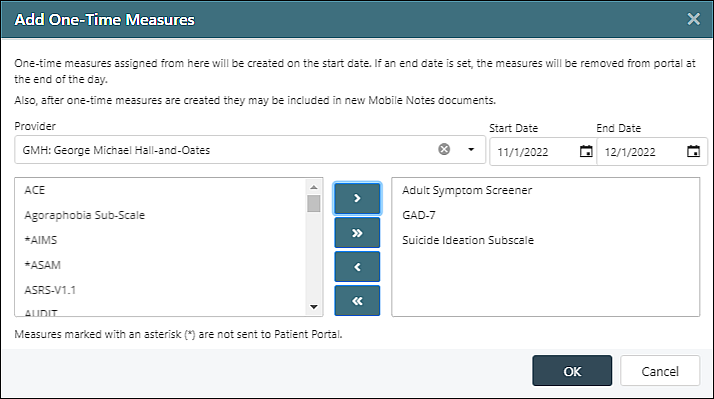
In the “Add One-Time Measure” window:
- Assign the Provider who will be authoring the note using the Provider drop-down list
- Enter a Start Date and an End Date
- Click the Measure
- Move the Measure to the column on the right side by clicking the greater than (>) button
- Click OK
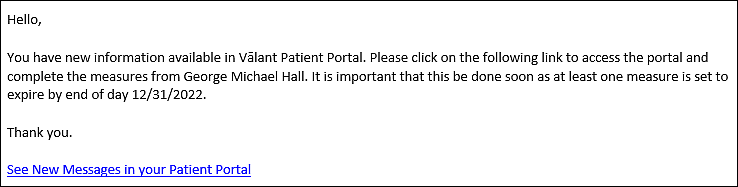
Once a measure is assigned it will be immediately available in the patient's MYIO account to be completed. The patient will see it as soon as their account is active. An email will be sent to the patient the following day to notify them of the measure. The email from the patient’s perspective will look like the following:
Scheduled Measures can only be assigned from the Patient’s Chart.
- Open patient chart
- Navigate to Measures | Scheduled Measures tab | Change Scheduled Measures

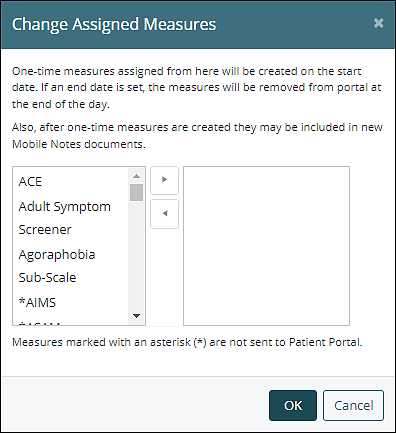
After clicking Change Scheduled Measures the "Change Assigned Measures" window will open:
- Select the Measure(s) to be assigned from the list on the left
- Move the Measure(s) to the column on the right side by clicking the right-pointing triangle
- Select the Measure(s) to be removed from the list on the right
- Move the Measure(s) to the column on the left side by clicking the left-pointing triangle
- Click OK
A reminder e-mail notification will be sent to the patient two days before the scheduled appointment.