This guide covers everything you need to know to set up Valant’s Prospective Patient Management tools and configure them to meet the unique needs of your practice.
- Setting up and customizing the content of Prospective Patient Forms
- Customizing Reference Data
- Treatment Types offered at your practice
- Condition Types that your providers treat
- Appointment Types to select
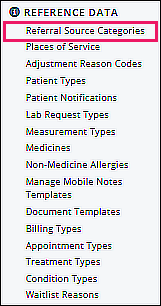
- Referral Source Categories
- Filling out Provider Treatment Profiles
- Options for sharing the link to submit Prospective Patient Forms
Prospective Patient Forms
Setting up Prospective Patient Forms requires “Practice” permission
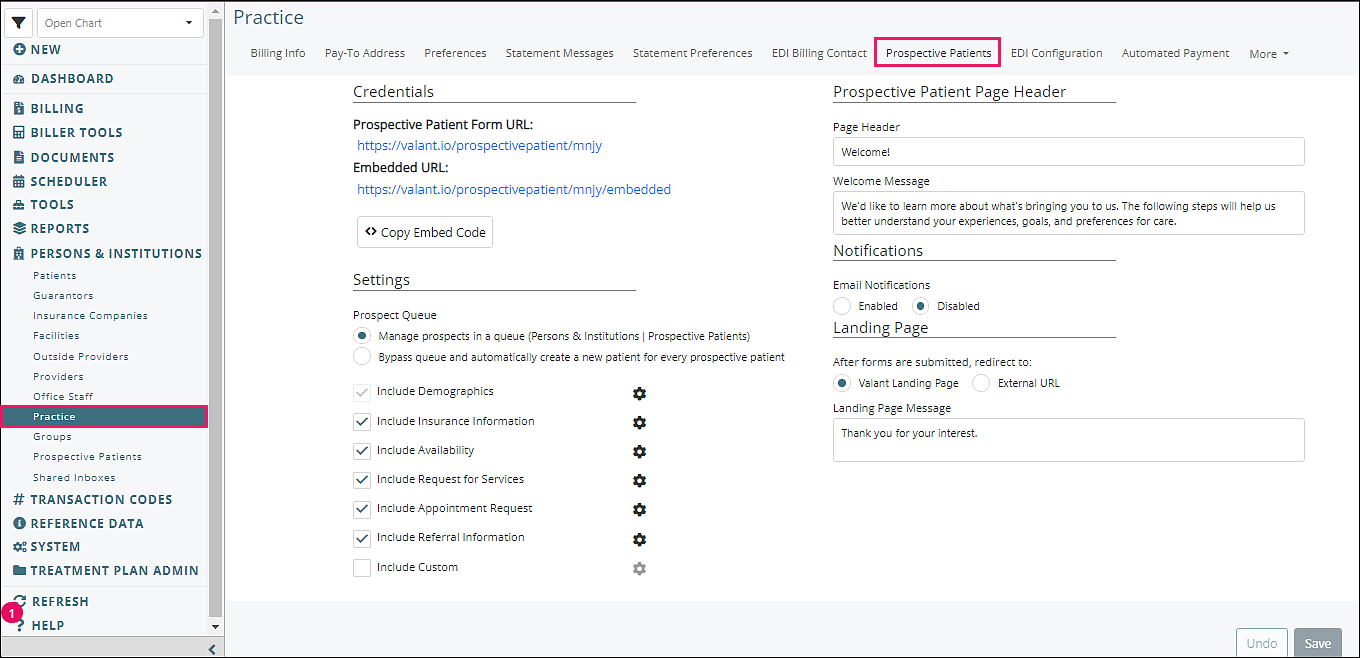
Navigate to Persons & Institutions | Practice | Prospective Patients tab
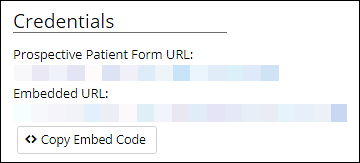
Credentials
- Prospective Patient Form URL: Prospective patients can use this link to submit only forms to apply for treatment at your practice.
- Options for sharing:
- Post the link on your practice website. When clicked, a new tab will open with the Prospective Patient Forms landing page, OR
- Click “Copy Embed Code” to copy to your clipboard HTML code for embedding the forms directly on your practice website. (This allows the option to keep your branding and navigation menu visible while Prospective Patient Forms are filled out)
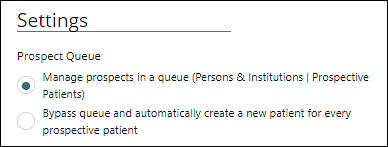
Settings
Prospect Queue settings: determine what happens each time Prospective Patient Forms are submitted.
- Manage prospects in a queue (Persons & Institutions | Prospective Patients) - recommended
- Allows your practice to manage Prospective Patients in a queue before converting them into Patients
- Allows you to use tools like
- Provider/Patient matching
- Availability search
- Outreach tracking
- Notes (that carry forward if the prospect is converted to a patient)
- Duplicate checking (when converting the prospect to a patient)
- Bypass queue and automatically create a new patient for every prospect application - alternative
- Immediately creates a patient record for every prospective patient form submission, without the need for any manual steps
- Bypasses the ability to use tools like duplicate checking
The next series of checkboxes allows selection of forms to include
- Click the checkbox to include a form
- Click the gear icon to the right of each form to open additional configuration settings for that form
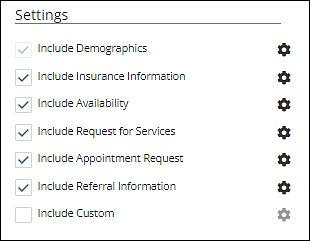
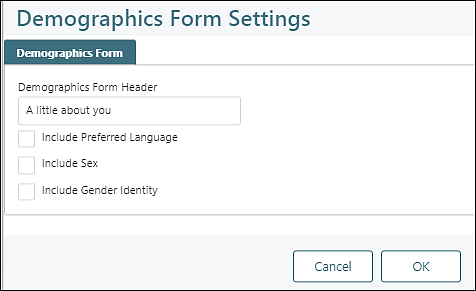
Include Demographics
- Cannot be deselected, but can be customized
- Demographics Form Header: the form ‘name or description’ the prospective patient will see
- Use the next three checkboxes to mark whether or not to include these optional fields on the demographic form:
- Include Preferred Language
- Include Sex
- Include Gender Identity
- Other fields for collecting basic demographics and contact information are always included on the form, and require no additional setup
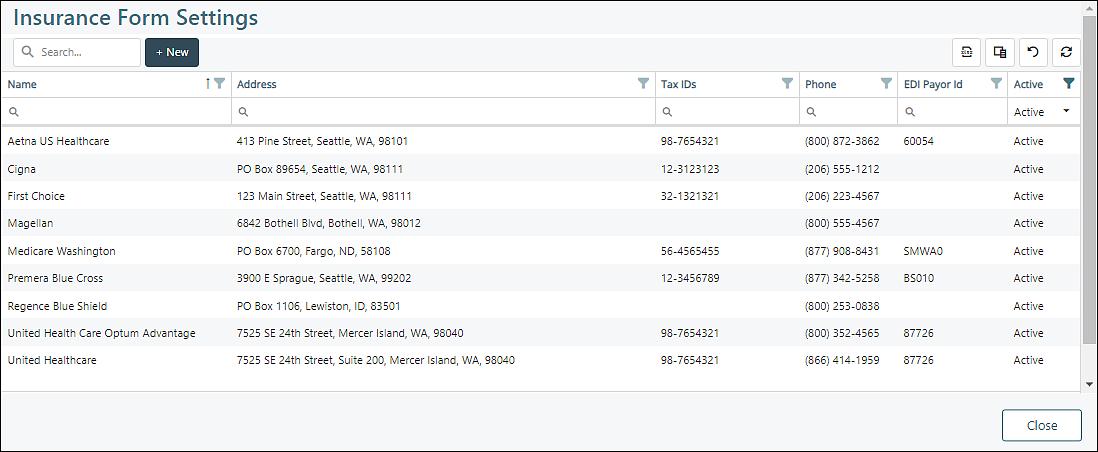
Include Insurance Information
- The prospective patient will be able to select from a list of all insurance companies set up in Persons & Institutions | Insurance Companies as "Active" and Display in PPM/MYIO", OR manually enter their insurance company name if they don’t find it on the list
- Practices can add new insurance companies here by clicking + New
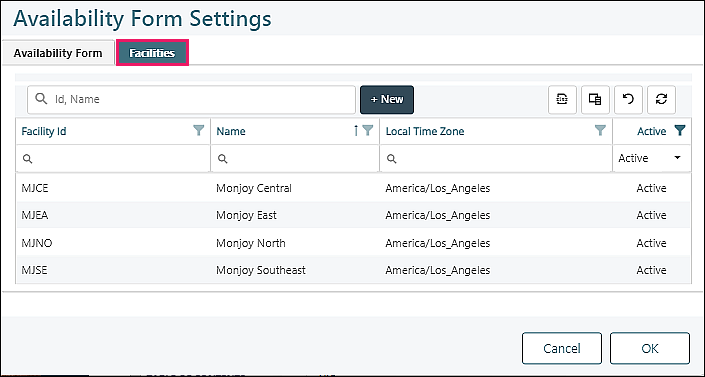
Include Availability
Prospective patients will be able to enter their availability to help inform scheduling- They will be prompted to select their preferred days, times, and facilities for appointments
- Make a note that schedulers will do their best to accommodate the availability preferences entered, but cannot guarantee appointment times
- Encourage the prospective patient to enter more than one day and time range to improve the chances of finding an available appointment slot that matches their preferences
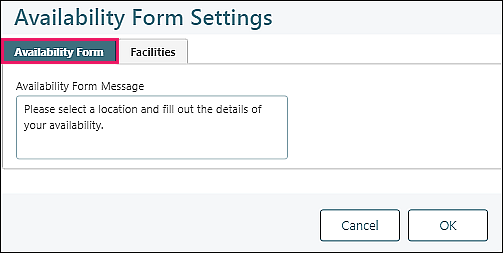 Facilities tab: includes list of available facilities found in Persons & Institutions | Facilities. Facilities can be added here by clicking + New
Include Request for Services
Request for Services Form tab: Includes a form for collecting the prospective patient’s treatment goals and preferences. 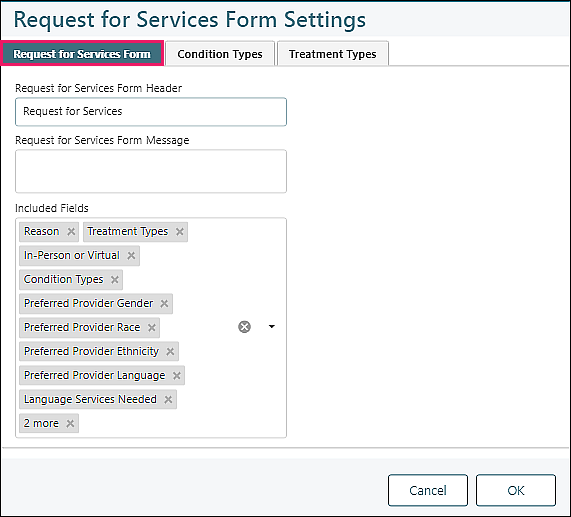
- Request for Services Form Header: the name that will be displayed for this step in the Prospective Patient Forms
- Request for Services Form Message: an optional field for entering a message that will be displayed to the prospective patient while filling out this form
- Included Fields: all fields on this step are optional. Use this selector to pick which fields you would like to include.
 If included, the following fields will be used in conjunction with provider Treatment Profiles to inform the provider “match” score displayed on the overview tab in Persons & Institutions | Prospective Patients
 - Treatment Types
- Condition Types
- Preferred Provider Gender
- Preferred Provider Race
- Preferred Provider Ethnicity
- Preferred Provider Language
Treatment Types tab: If the “Treatment Types” fields are included, the choice options for these fields will be the customizable lists defined in Reference Data | Treatment Types, but can also be added or edited in this tab
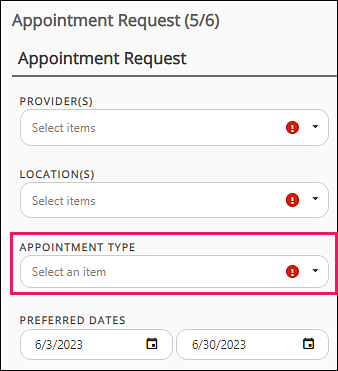
Include Appointment Request
Mark this checkbox to include a step that allows the prospective patient to search for available appointments and select an appointment to request.
Some practices choose to include either this step or the Availability step, but it is also to include both if desired.
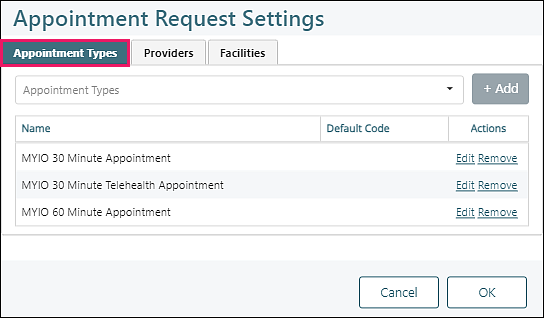
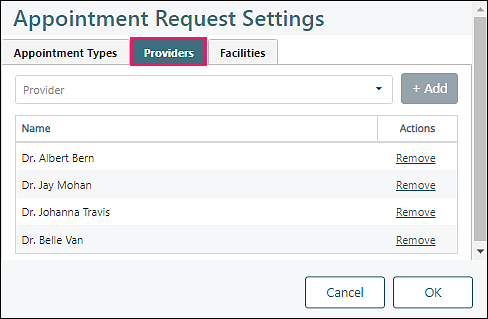
Appointment Types tab: Appointment Types, Providers, and Facilities need to be set up outside of the Persons & Institutions | Practice | Prospective Patients tab. To select from available Appointment Types, Providers, and Facilities, click to see the drop-down options, click on the desired option, click + Add.
If including the Appointment Request step; Appointment Types, Providers, and Facilities can be searched for
- For each Appointment Type included, a “Default Code” can be chosen to use for appointments of that type in order to save time when approving pending Appointment Requests
- To set up or edit the list of Appointment Types, navigate to Reference Data | Appointment Types
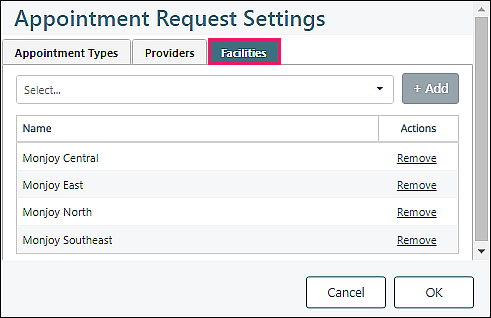
Facilities tab: To set up or edit your list of Facilities, navigate to Persons & Institutions | Facilities
Adding this section includes a step that allows the prospective patient to share information about how they found the practice.
Referral Information Form tab:
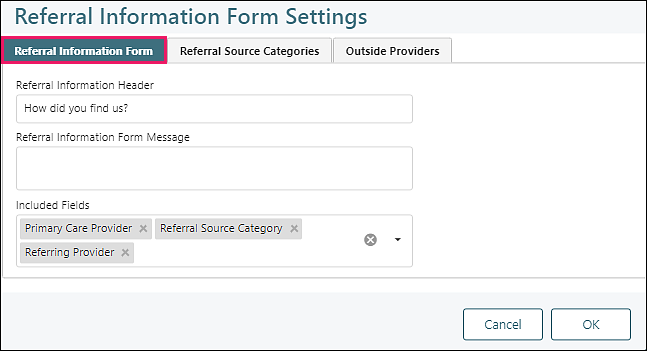
- Referral Information Form Header: the name that will be displayed for this step in the Prospective Patient Forms
- Referral Information Form Message: an optional field for entering a message that will be displayed to the prospective patient while filling out this form
- Included Fields: all fields on this step are optional. Use this selector to pick which fields to include.
- If you include the "Referral Source" field, it will only appear on the form if "Healthcare Provider" is selected as the Referral Source Category
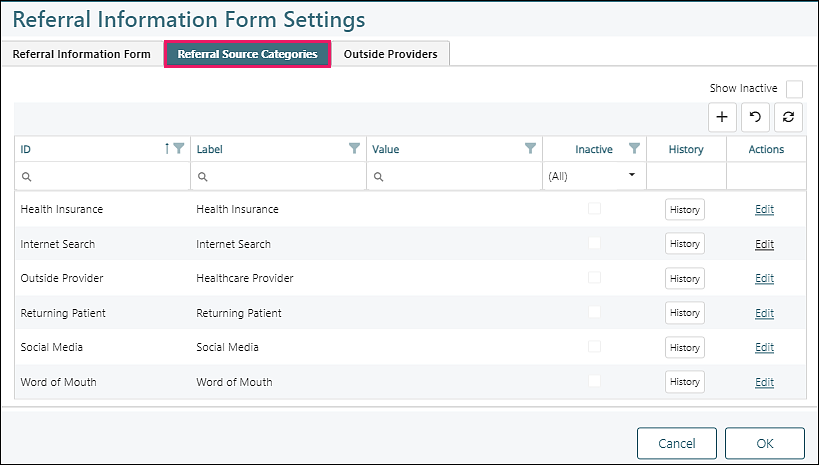
Referral Source Categories tab: If you include the "Referral Source Category," the choice options will be the customizable list defined in Reference Data | Referral Source Categories.
Practices can add new referral source categories here by clicking +
If you include the "Referral Source" field, it will only appear on the form if "Healthcare Provider" is selected as the Referral Source Category
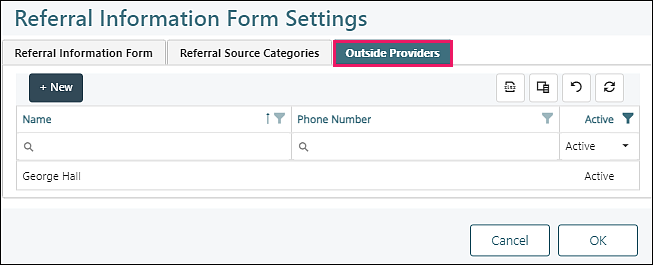
Outside Providers tab: the options shown will be the customizable list defined in Persons & Institutions | Outside Providers
Practices can add new outside providers here by clicking + New
Include Custom
Custom Fields and Tabs may be edited by clicking on the line or added by clicking + New.
- Clicking + New brings the user to Tools | Manage Custom Fields or Tools | Manage Custom Tabs
- Custom Tabs are added via Tools | Manage Custom Tabs
- Custom Fields (to put on a Custom Tab) are added via Tools | Manage Custom Fields
Manage Custom Fields tab:
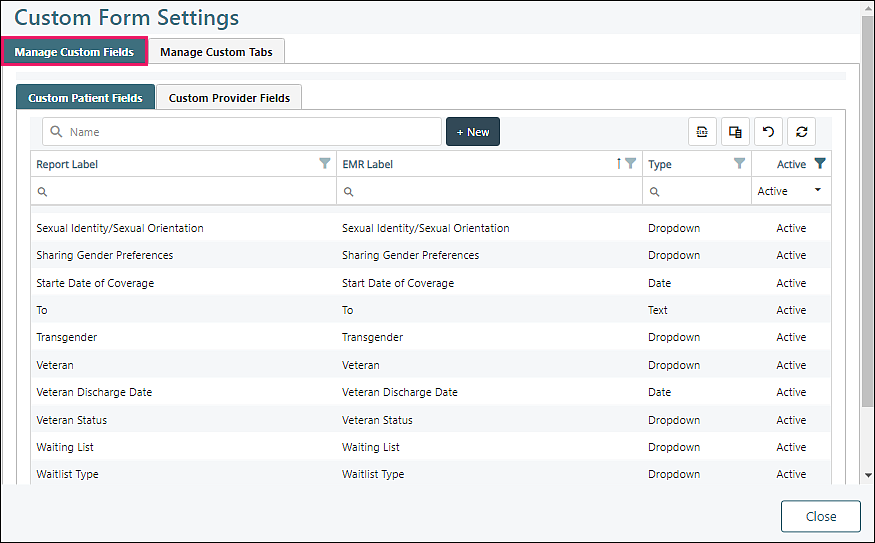
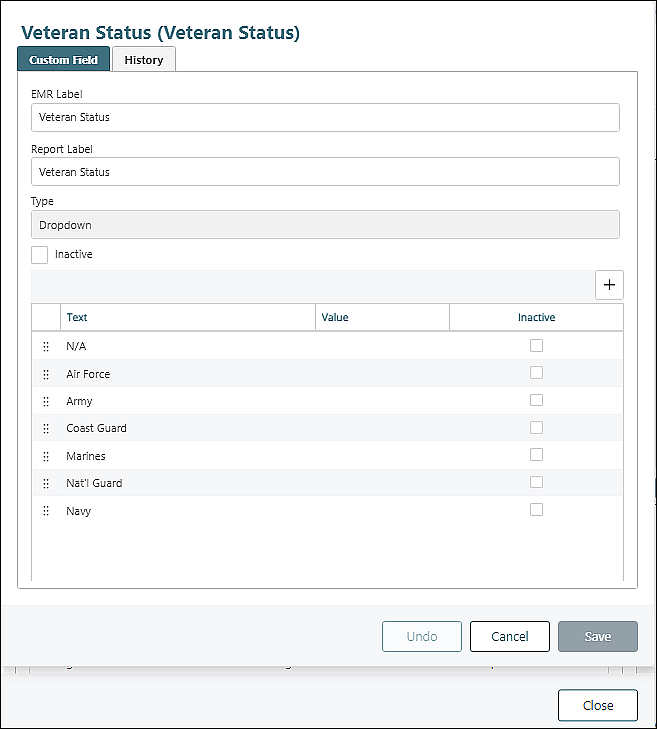
Click on a line to view or edit the Custom Field information
Manage Custom Tabs tab:
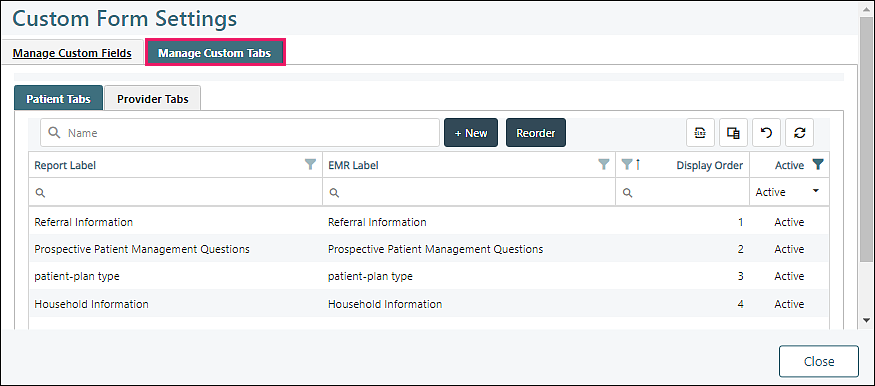
Click on a line to view or edit the Custom Tab information
Custom Tab tab example:
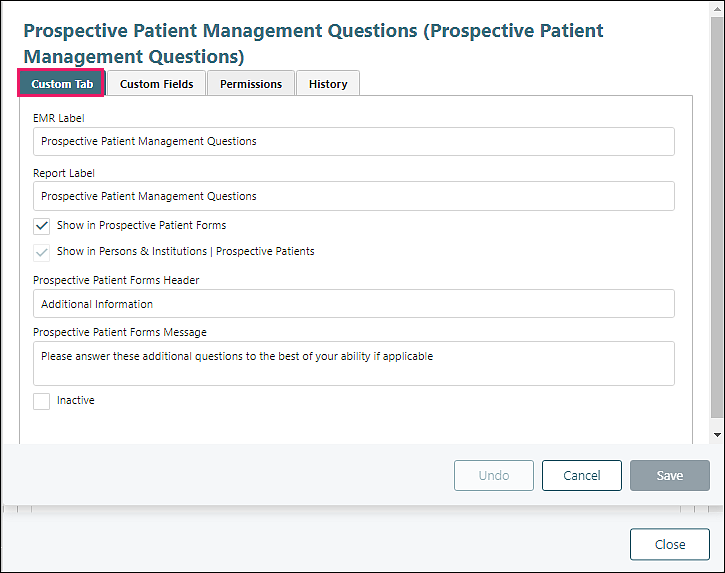
- Prospective Patient Forms Header: the name that will be displayed to prospective patients for this step
- Prospective Patient Forms Message: an optional field for any additional messaging or instructions you wish to display to the prospective patient when filling out this step
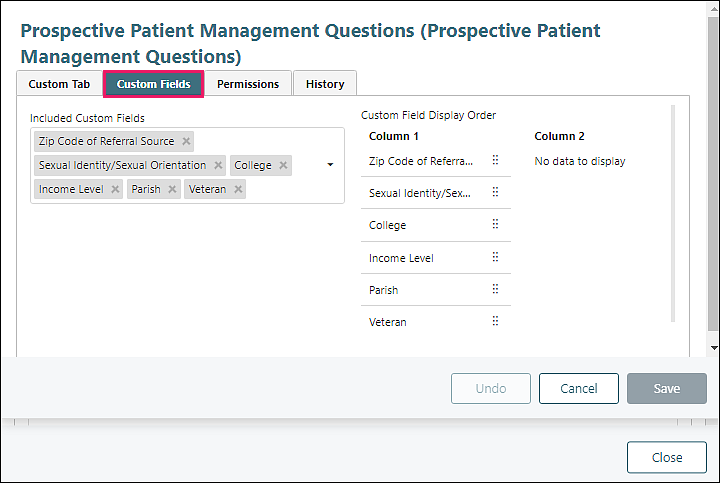
Custom Fields tab example:
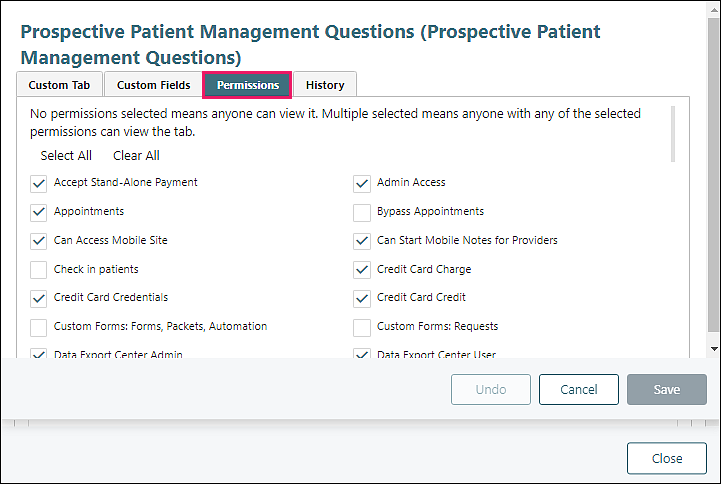
Permissions tab example:
Custom Tabs are also included in the Patient Record, and details entered by the prospect will carry forward into the Patient Record if the prospect is converted to a patient
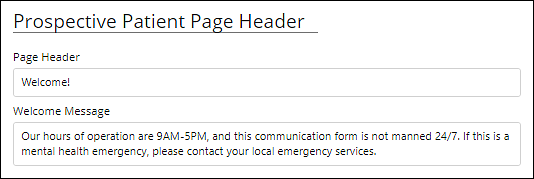
Prospective Patient Page Header
The Page Header and Welcome Message are displayed at the top of the page when prospective patients are filling out the prospective patient forms.
Landing Page
- Practices can now set up a "Thank you" page where prospective patients will land after submitting the online forms. There are two options:
- Valant Landing Page: a page within the Prospective Patient Forms URL that shows a post-submission message customized by the practice
- External URL: A page outside of Valant defined by the practice (for example, a page on the customer's own website). This option can be used by practices who wish to track lead source information from their landing page via Google Analytics using UTM codes

Customize Reference Data
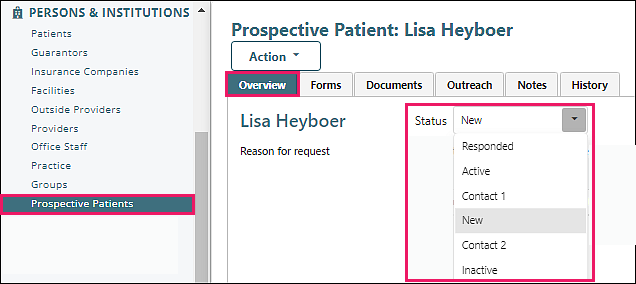
Practices can create custom statuses beyond the standard 'Active' and 'Inactive' options. For example, stages can be specified for active prospective patients (e.g., New → Contacted → Responded → Converted) and reasons can be defined for inactive prospective patients (e.g., Referred Out or Lost Contact).
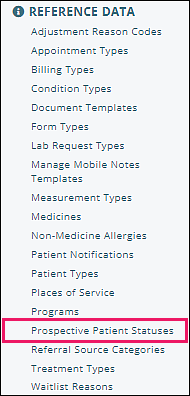
Navigate to Reference Data | Prospective Patient Statuses
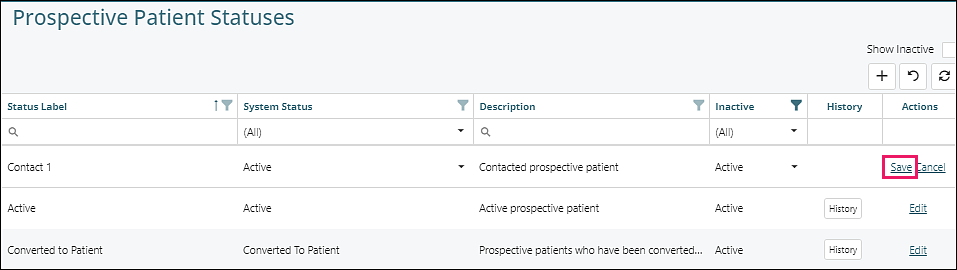
Click + to add a new custom status

Type in a Status Label, select a System Status from the drop-down options, type in a Description, click Save
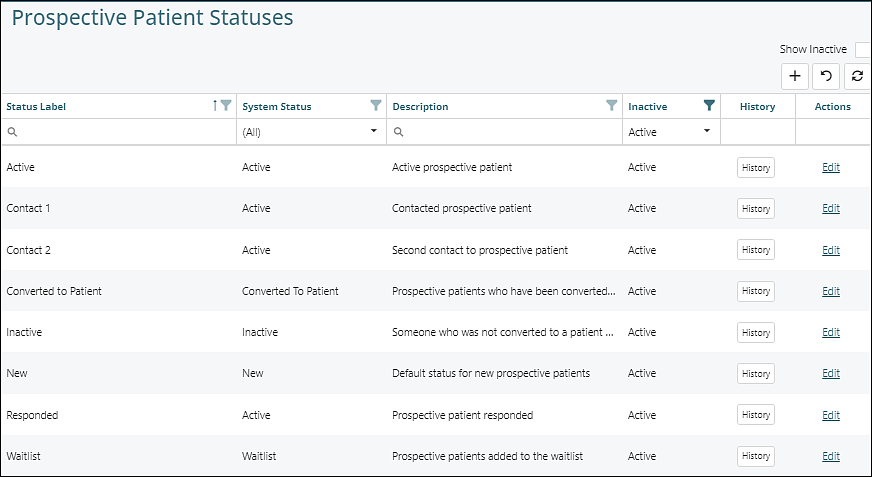
New Statuses will show in the grid with a visible audit by clicking the History button
To update a Status, navigate to Persons & Institutions | Prospective Patients, select a name from the list, from the Overview tab select a Status from the drop-down options
The following details can be edited either from Reference Data or by using the gear icon in Persons & Institutions | Practice | Prospective Patients tab
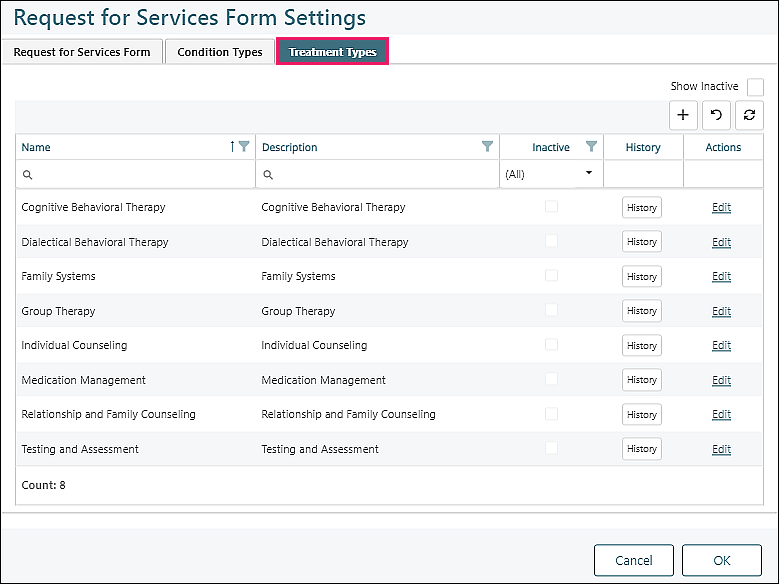
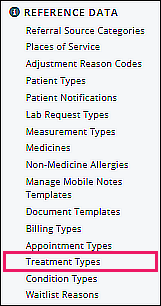
Navigate to Reference Data | Treatment Types
Treatment Types Locations
Persons & Institutions | Providers | select provider from list | Treatment Profile tab:
- Informs whether the provider offers the service
- Displays the provider’s level of experience with that treatment type

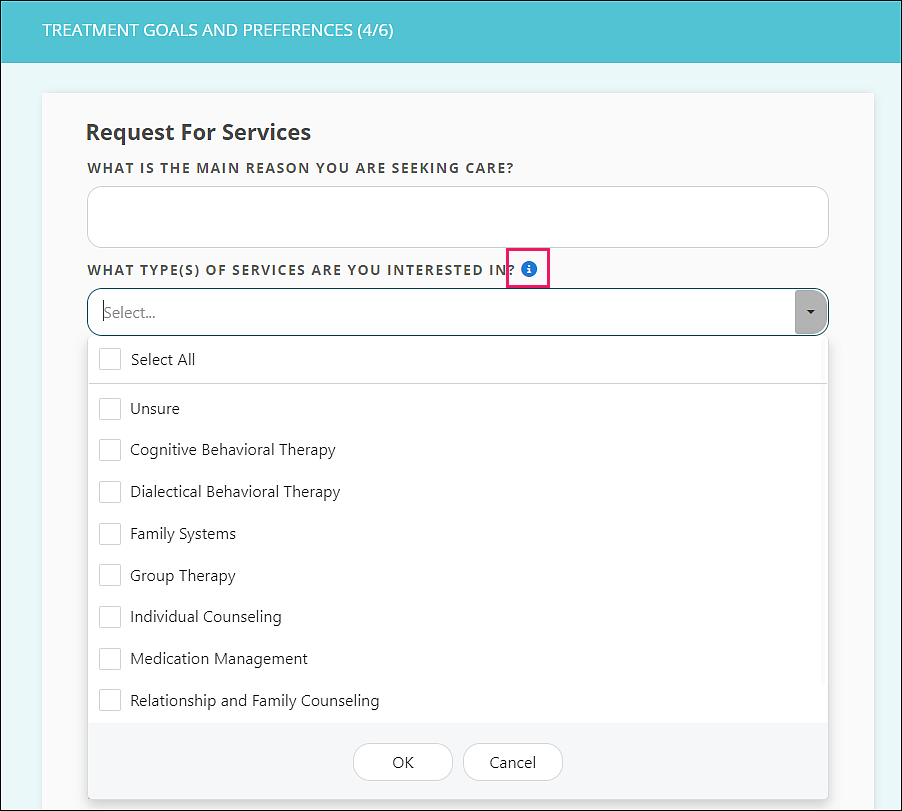
Prospective Patient Forms:
- Optional field asks the prospective patient to select which treatment types they are interested in receiving.
- When prospective patients click the info icon, the “description” for each Treatment Type will be displayed
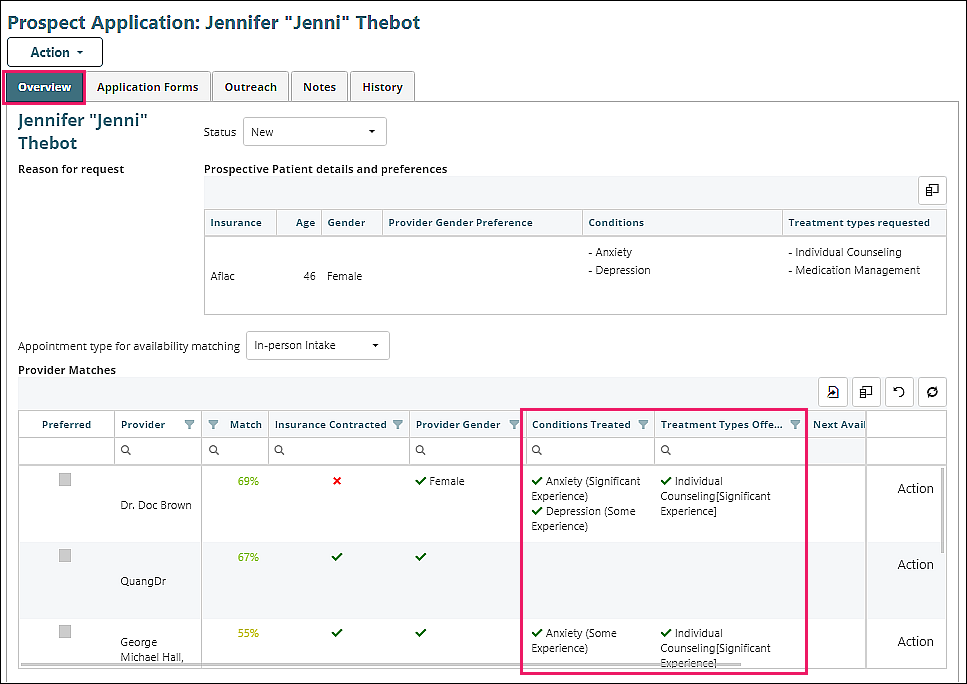
Persons & Institutions | Prospective Patients | select name from list | Overview tab:
The information from these fields is used to show which providers offer the services being requested by a prospective patient
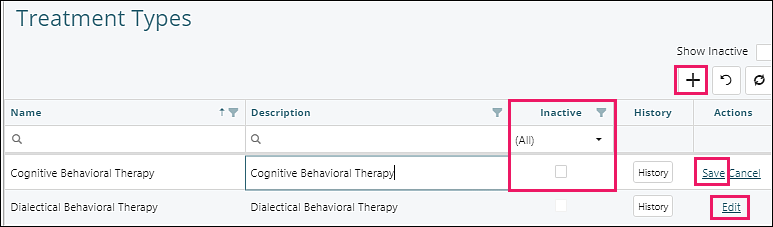
Managing Treatment Types
To simplify the setup process, a default list of commonly used treatment types is included.
- These can be used as-is, but every practice is unique, and customizing this list to align with the services offered at your practice is recommended
- Note: Some practices may decide to include treatment types that they don’t currently offer, so they can track the demand for those treatment types among their prospective patient base and use that data to help determine which services to consider offering in the future
To remove a treatment type
- Click Edit
- Check the Inactive checkbox
- Click Save
To change the name or description
- Click Edit
- Make updates directly in those columns
- Click Save
To add a new treatment type
- Click the + button: a new row will appear at the top of the table
- Enter Name and Description directly in those columns
- Click Save
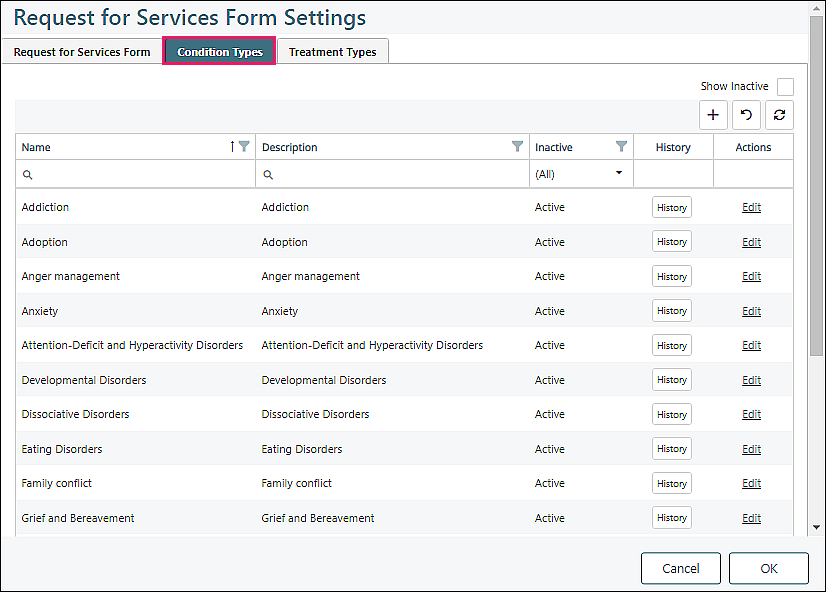
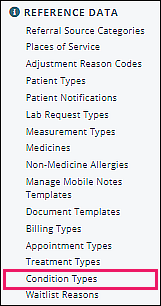
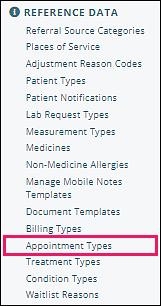
Navigate to Reference Data | Condition Types
Condition Types Locations
Persons & Institutions | Providers | select provider from list | Treatment Profile tab:
- Informs the provider’s level of experience treating that condition
- Option to mark that the provider prefers not to treat the condition
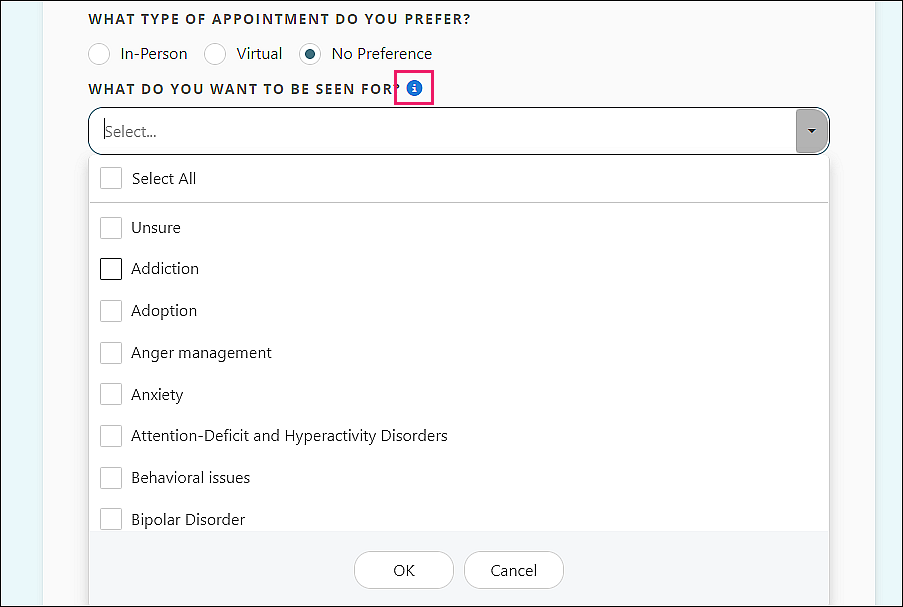
Prospective Patient Forms:
- Optional field asks the prospective patient to select which conditions they want to be seen for
- When prospective patients click the info icon, the “description” for each Condition Type will be displayed
Persons & Institutions | Prospective Patients | select name from list | Overview tab:
The information from those fields is used to help match prospective patients with a provider experienced in treating their selected conditions

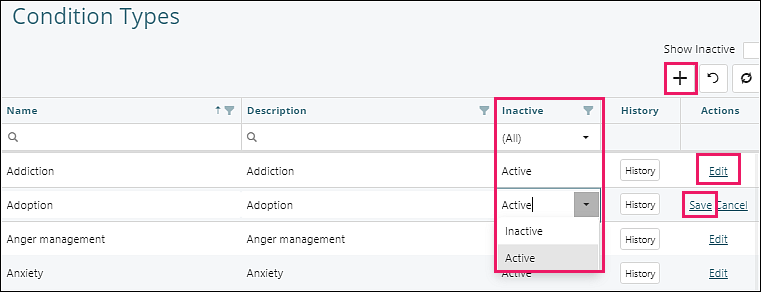
Managing Condition Types
To simplify the setup process, a default list of common conditions is included.
To remove a condition type
- Click Edit
- Select Inactive from the drop-down list
- Click Save
To change the name or description
- Click Edit
- Make updates directly in those columns
- Click Save
To add a new condition type
- Click the + button: a new row will appear at the top of the table
- Enter Name and Description directly in those columns
- Click Save
- The “Active” items on these lists will show up in alphabetical order on the Provider Treatment Profile and Prospective Patient Forms
- The Prospective Patient Forms list will also include “Unsure” at the top
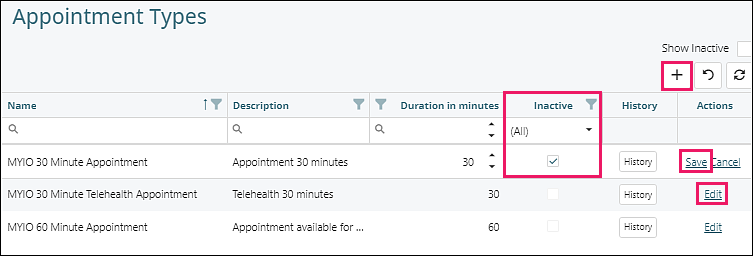
Navigate to Reference Data | Appointment Types
Appointment Types Locations
The appointment request step in Prospective Patient Forms
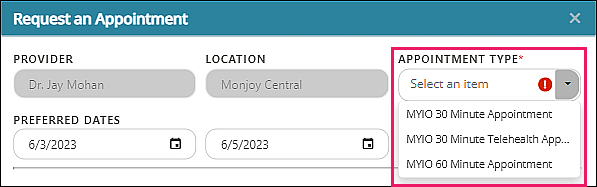
The appointment request tool in MYIO
Managing Appointment Types
To remove an appointment type
- Click Edit
- Check the box in the Inactive column
- Click Save
To change the name or description
- Click Edit
- Make updates directly in those columns
- Click Save
To add a new appointment type
- Click the + button: a new row will appear at the top of the table
- Enter Name and Description directly in those columns
- Click Save
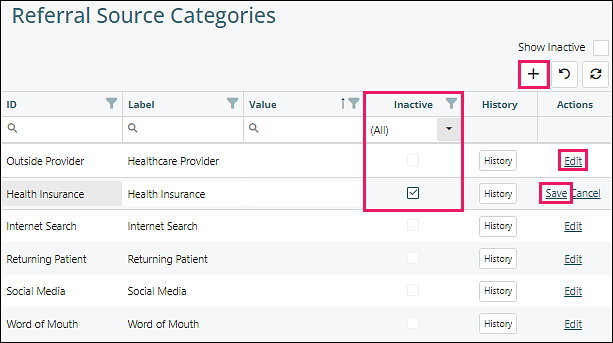
Navigate to Reference Data | Referral Source Categories
Referral Source Categories Locations
Prospective Patient Forms | Referral Source Information step
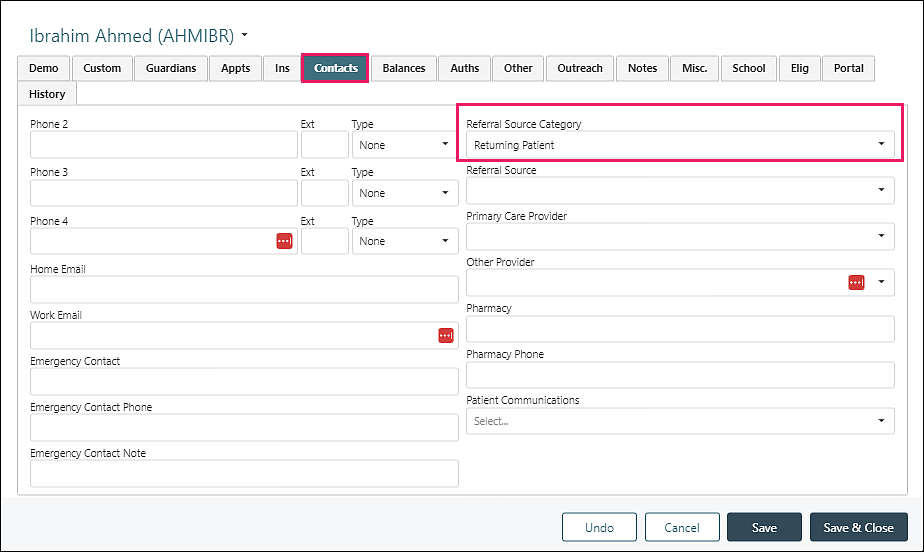
Persons & Institutions | Patients | select patient | Contacts tab
Managing Referral Source Categories
To simplify the setup process, a default list of common referral source categories is included.
To remove a referral source category
- Click Edit
- Check the box in the Inactive column
- Click Save
To change the name or description
- Click Edit
- Make updates directly in those columns
- Click Save
To add a new referral source category
- Click the + button: a new row will appear at the top of the table
- Enter Name and Description directly in those columns
- Click Save
Provider Treatment Profiles
In the overview tab of a prospective patient record, the Provider Treatment Profile details will be shown and will help inform the “Match” score
Navigate to Persons & Institutions | Providers

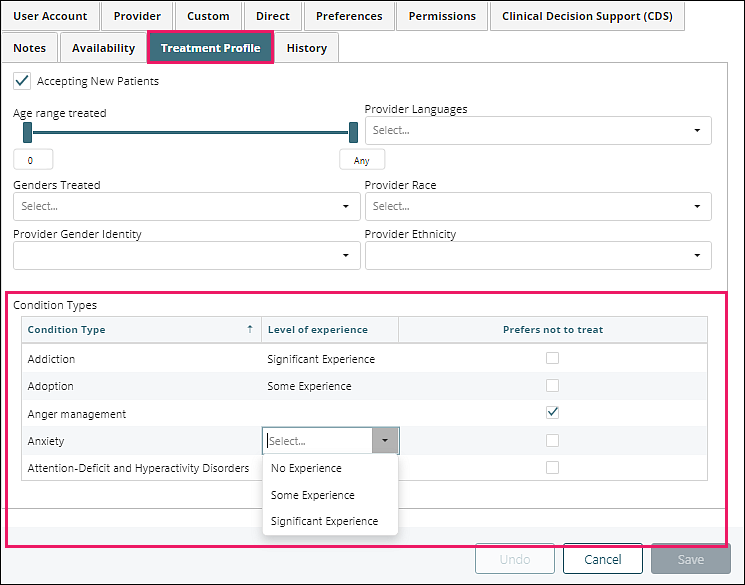
Select a provider from the list and click the Treatment Profile tab
Treatment Profile fields are used for tracking details about the provider, the patient populations that they treat, and their areas of experience, in order to help match up prospective patients with providers that are a good fit
Treatment Profiles are NOT required to start using Prospective Patient Management tools, but entering this information allows for the full advantage of the provider/patient matching algorithm
Treatment Profiles can be edited by any Provider or Staff with the “Persons and Institutions” permission
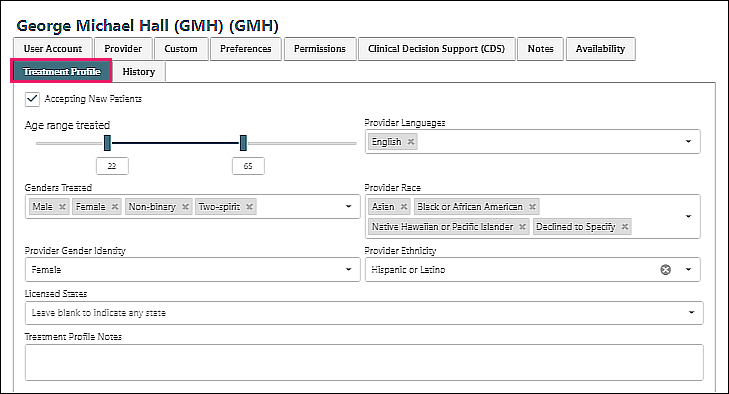
Treatment Profile Top Fields
Accepting New Patients (not checked by default)
- The Provider Matching table will only show providers with this checkbox marked
- Note that this is just a default filter – it can be manually overridden
Population Treated
- Age range treated
- Genders Treated
Provider Details
Some prospective patients might prefer a provider of a particular gender identity, spoken language, race, or ethnicity. There are optional fields that can be included in the Prospective Patient Forms for collecting those preferences.
These next fields in the Treatment Profile are used for matching to those preferences.
- Provider Gender Identity
- Provider (Spoken) Languages
- Provider Race
- Provider Ethnicity
Remember that all are optional.
Licensed States
This multi-select field is for tracking which state(s) the provider is licensed to provide services. This field is primarily useful for providers who offer telehealth visits and are only licensed to provide treatments to patients living in particular states. If one or more licensed states is selected for a provider, that provider will not show up in the "Provider Matches" table in Persons & Institutions | Prospective Patients when the prospective patient's home state is not one of their licensed states. If the licensed states field is left blank for a provider, it is assumed that provider can provide services to patients living in any state.
Treatment Profile Notes
This is a free text field for any additional notes that might be taken into consideration when matching prospective patients with a provider. It can be added as a column in the Provider Matches table in Persons & Institutions | Prospective Patients | Overview tab.
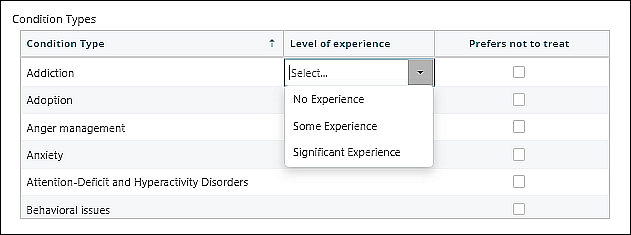
Condition Types
Customizable list: populated from all “Active” items in Reference Data | Condition Types
For each condition type:
- Select provider’s level of experience from the drop-down list
- No Experience
- Some Experience
- Significant Experience
- Checkbox to mark if the provider “Prefers not to treat” that condition
Can scroll vertically to show additional options
Treatment Types
Customizable list: populated from all “Active” items in Reference Data | Treatment Types
For each treatment type:
- Select provider’s level of experience from the drop-down list
- No Experience
- Some Experience
- Significant Experience
- Checkbox to mark if the provider “Prefers not to treat” that condition
Can scroll vertically to show additional options
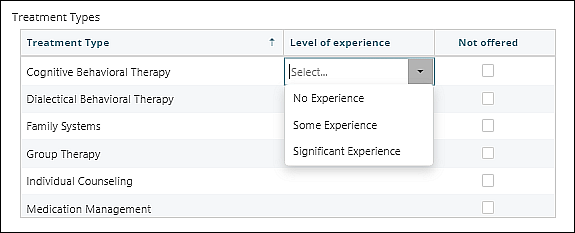
Click Save when complete
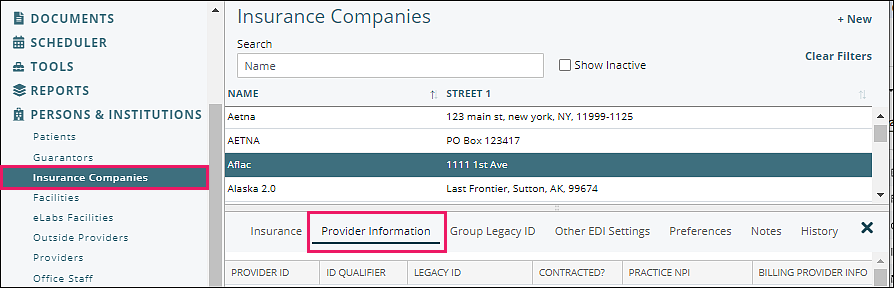
Insurance Companies
Another important factor to consider when matching Prospective Patients to a provider is whether the provider is contracted with the patient’s insurance company
This information IS used in the Provider Matching algorithm
But it IS NOT found on the Treatment Profile
Instead, it is set via Persons & Institutions | Insurance Companies | select Insurance Company from list | Provider Information tab. For more information, refer to the article Provider Billing Info for Insurance Company