
Patient payments can be recorded a couple of different ways. This section will demonstrate those methods as well as show you how to perform several functions that can occur after a payment is posted.
Accepting Payments from the Calendar
The Accept Payment button on an appointment is used to process payment for a specific date of service directly through the calendar. This is the most popular workflow for accepting payments from patients. Practices with integrated credit card processing can also accept credit card payments at this time. Accepting payments records the appointment, which enables creation of the charge and posting of the payment. It is required that users have the "Record Appointments" permission to accept payment from the calendar. To accept a payment, the patient needs to have the required demographics for billing and a diagnosis entered.
Accept Payment Workflow
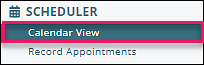
From the navigation menu click on Tools | Scheduler | Calendar View.
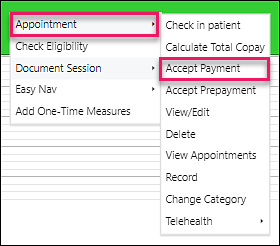
Right-click (or Mac equivalent) on the appointment and select Appointment | Accept Payment.
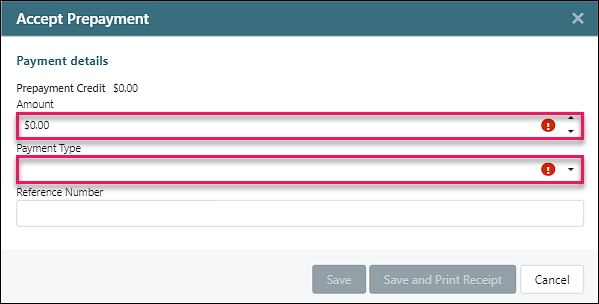
The "Accept Payment" window will open and allow users to enter the payment details.
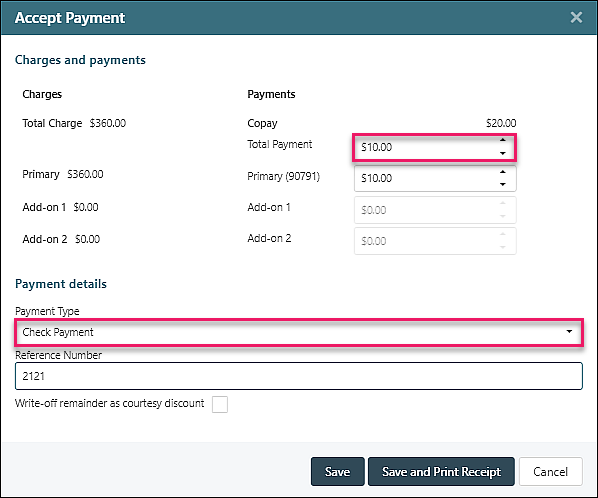
Click Save or Save and Print Receipt. This will complete the workflow.
Explanations of the "Accept Payment" window components:
- Total Charge: overall charge for the session, the summation of all primary and add-on codes.
- Primary: shows the CPT code of the primary transaction code as well as the charge for that specific procedure.
- Add-on 1: shows the CPT code of the add-on transaction code as well as the charge for that specific procedure.
- Add-on 2: shows the CPT code of the add-on transaction code as well as the charge for that specific procedure.
- Pre-payment Credit: If the patient has prepayment credit from a prior over payment the remaining amount left to still be applied will appear here.
- Copay: if the patient has a co-pay listed for him/her then the amount of that co-pay appears in this field.
- Total Payment field: the total amount of payment being accepted.
- Primary field: the total amount of payment being applied to the primary procedure code.
- Add-on 1 field: the total amount of payment being applied to the add-on procedure code.
- Add-on 2 field: the total amount of payment being applied to the second add-on procedure code.
- Payment Type drop-down box: shows the different methods of payment that can be chosen from to reflect the method by which the patient paid for the session.
- Reference Number field: an optional field that can be used to track the check or card number used to pay for the session.
- Write-off Remainder as Courtesy Discount checkbox: when checked this box writes off any balance remaining as a patient courtesy discount after the payment is applied.
- Save button: enables creation of a charge and acceptance of payment without generation of a receipt.
- Save and Print Receipt button: this button enables creation of a charge, acceptance of payment, and generation of a receipt that the patient can use to submit for insurance reimbursement. The receipt is also saved in the patient's chart under documents.
- Cancel button: this button cancels the accept payment option. Checking this cancels the creation of a charge and acceptance of payment, and no receipt is generated.
Note: If Receipt Book is turned on, the visit will not be recorded with the posting of the payment. Recording the appointment will be a separate function.
Accepting Integrated Credit Card Payments
If "Auto Payment CC" is selected as the payment type it will open the "Payment Transaction" tab in the "Automated Payment Processing" window when "Save" or "Save and Print Receipt" is selected. This payment type is for practices who have integrated credit card processing.
Note: Click on the "Card Manager" tab to view stored cards, either entered by the patient or the practice.
Required fields for billing are highlighted in pink. The "Select Card" drop down list shows all of the cards listed for the patient in the "Card Manager". If the correct card is not listed, use the "New Card" option and enter the information in the "Card Details" fields. Choose a name for the card and replace the New Card text with that name. If the card is to be stored for future use, click the box to "Save to Card Manager".
Once card details are entered or a card stored in the Card Manager is selected, Click Submit.

Billing Information Options:
- "Patient: Use Patient's Billing Information" radio button: defaulted on, cardholder information on the right side is automatically populated. If the "Email for Receipt" field is populated, the cardholder receives a receipt.
- "New: Type Billing Information" radio button: if the cardholder is not the patient, enter the cardholder's information.
- "Guarantor: User Guarantor's Billing Information" radio button: if the cardholder is in the patient's demographic file, the information will populate from that location.
Apply Patient Payment
Patient Payments can be applied on the Apply Patient Payment page by doing the following:
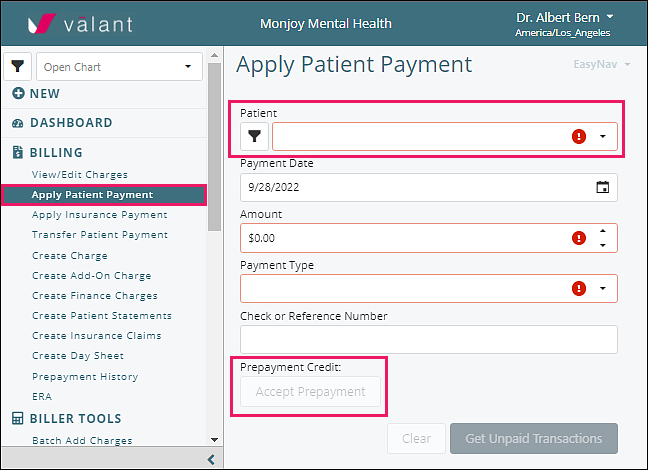
Navigate to Billing | Apply Patient Payment
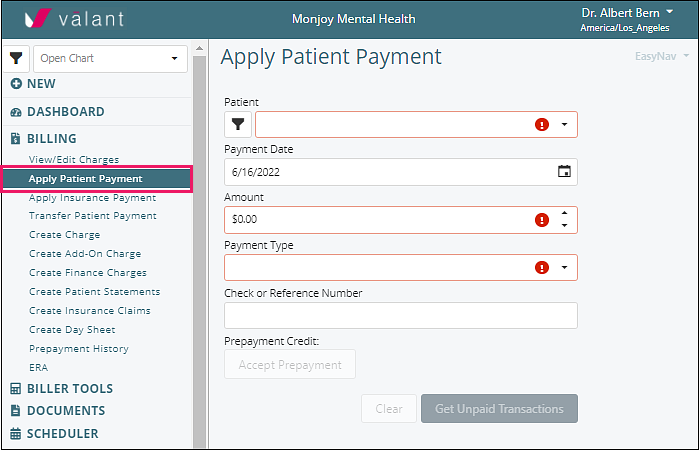
- Choose the patient that received the service in the Patient dropdown menu
- Indicate date the payment is being applied in the Payment Date field. This field is defaulted to today's date
- Enter the Amount of the payment.
- Choose the Payment Type from drop down list ("Auto Payment CC" is an option if using integrated credit card processing)
- Enter the check or reference number for accounting purposes (optional)
- Click Get Unpaid Transactions in order to find the specific charge to assign this payment
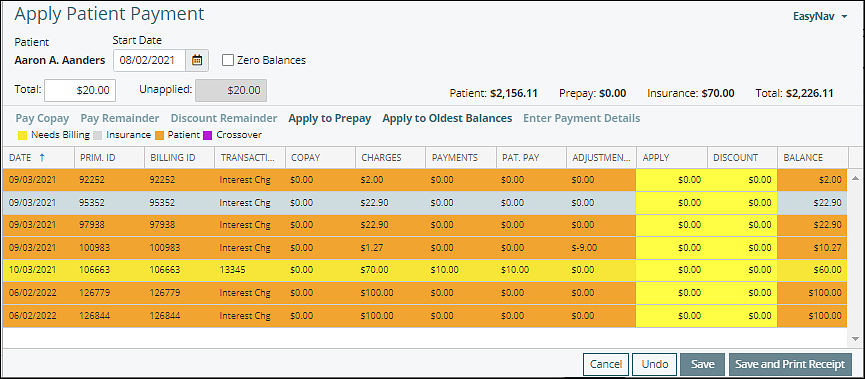
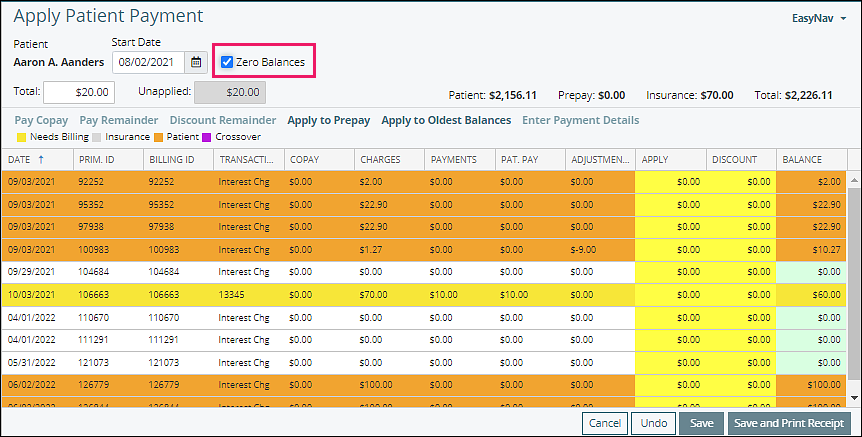
Note: By default, this pulls up charges with patient balances. If all charges need to be seen, the Zero Balances checkbox should be checked.
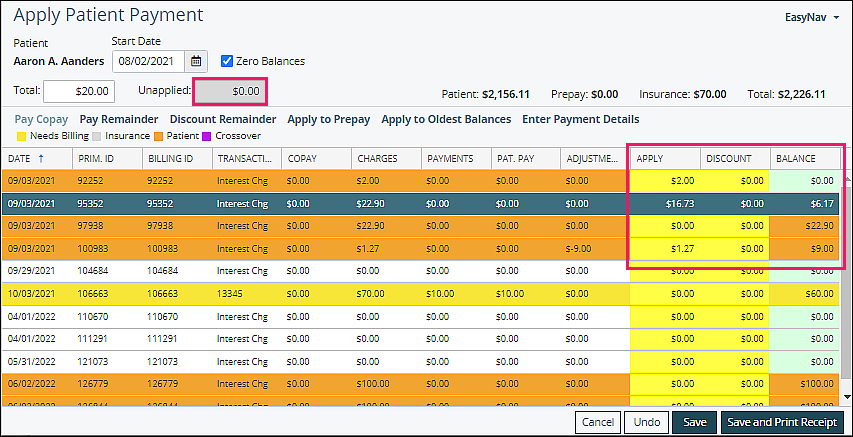
Click in the yellow "Apply" field of the specific charge and type in the relevant dollar amount.
Once all amounts are assigned and the Unapplied box in the upper left corner reads $0.00 then click Save or Save and Print Receipt on the bottom right corner of the page.
Note: Clicking Save and Print Receipt will download a PDF receipt that can be shared with the patient. It will save to the patient chart if "Receipt Book" is not used, and also requires "Save Receipts" box to be checked in Persons & Institutions | Practice | Preferences | Billing. This can be completed with any form of payment.
DeletePrepayments
Prepayments will allow monies to be accepted and assigned to a specific patient prior to a charge being created. This can be useful for a new patient when a billable charge has not been created or a patient wants to pay in advance for a block of visits.
Accepting a Prepayment
Collecting a Prepayment can be completed with the apply patient payment in the Billing menu, or by right-clicking on an appointment in the scheduler and clicking Accept Prepayment.
Navigate to Billing | Apply Patient Payment
Select a patient and click Accept Prepayment which opens a separate window
- Enter the payment Amount
- Choose the Payment Type from the drop-down list
- Reference Number (optional): check number or CC authorization number
- Click Save or Save and Print Receipt
The following image illustrates where the user can see the patient's prepaid amount.
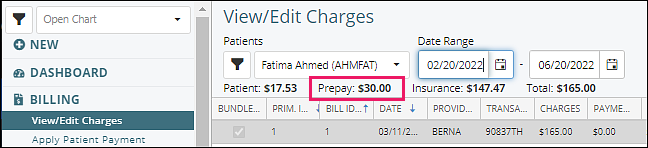
Remember to apply the pre-payments to the appropriate charges as soon as possible.
Apply Prepayment
- Click Billing | Apply Patient Payment
- Choose the patient that received the service from the Patient drop down list
- Indicate the date the payment is being applied in the Payment Date field which is defaulted to today's date
- Enter the payment Amount
- Choose "Pre-payment Transfer" from the Payment Type drop down list
- Click Get Unpaid Transactions
![]()
This will open the "Select Prepayments to Apply" window. Select the prepayment to transfer from and click OK
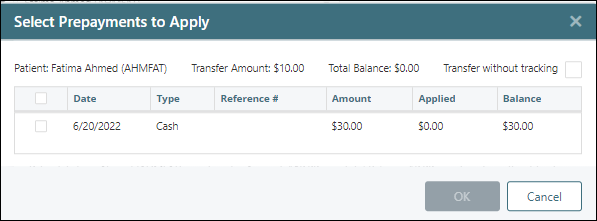
Note: "Transfer without tracking" checkbox means it will only post the prepayment transfer unattached in Prepayment History.
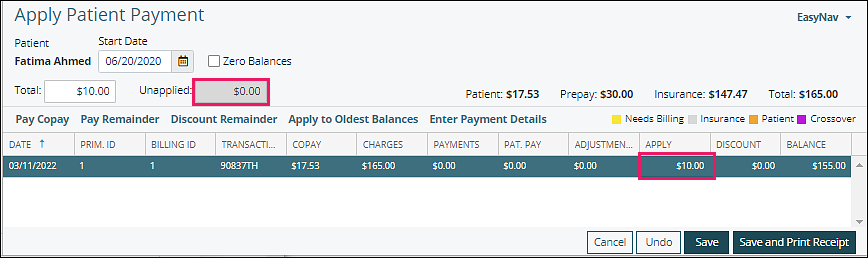
The “Apply Patient Payment” window will open and allow a user to apply the prepayment to specific charges.
Enter the desired amount into the "Apply" field for each charge that the prepayment is being applied to (be sure the "Unapplied" field reads "$0.00") and click Save or Save and Print Receipt.
Run the following report to check all pre-payment activity:
Click on Reports | System Reports | Billing | Pre-payments
DeleteTransfer Patient Payments
Payments can be transferred from one patient to another or from one charge to another for the same patient.
Click Billing | Transfer Patient Payment
![]()
- Select a patient
- Indicate transfer date of the payment. This field is defaulted to today's date
- Enter the amount you wish to transfer
- In the "Transfer Payment to Other Transaction(s) Note" field, enter information describing the reason for a transfer and/or the date of service on which to transfer money
- Click Get Transactions
![]()
Check the box to the left of the date of service (DOS) from which to transfer money, then click Next.
A list of charges will appear to choose from that the unapplied money can be assigned to. The unapplied money will show in the upper right corner. This action cannot be completed until this box reads $0.00. All charges that actions have been applied to will show in bottom screen.
Note: The screen in this step will default to the originally selected patient in the drop-down list, but can be changed to a different patient when transferring balances from one patient to another.
Enter dollar amount in the yellow apply box of the specific charge, then click Save.
Apply Credit Card Credit
Practices who utilize Valant's integrated credit card processing can use the Apply Credit Card Credit page to refund payment back to a patient's credit card. This will work for any payments taken via a credit payment. Users are required to have the Credit Card Credit permission to access Apply Credit Card Credit. The patient transactions that appear in the Credit Card Credit page are limited to charges with a credit card payment. To apply a credit card credit:
1. From the Navigation Menu select Billing | Apply Credit Card Credit.
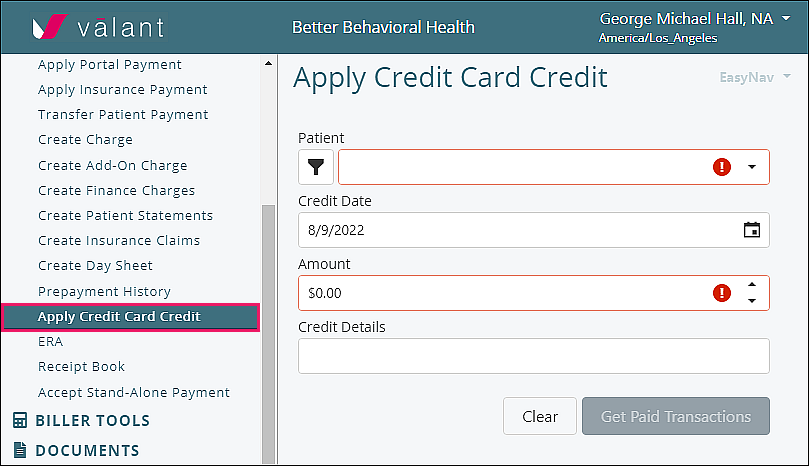
2. On the "Apply Credit Card Credit" screen enter details for the patient, credit date, the amount to be credited, and select Get Paid Transactions. This opens a list of all “Auto Payment CC” payments. Enter the amount of the refund into one or more "Apply" fields. Click Save or Save and Print Receipt. Save and Print Receipt will generate a version of the receipt that can be shared with the patient.
Note: If all charges need to be seen, including those paid to zero, the "Zero Balances" checkbox should be checked.
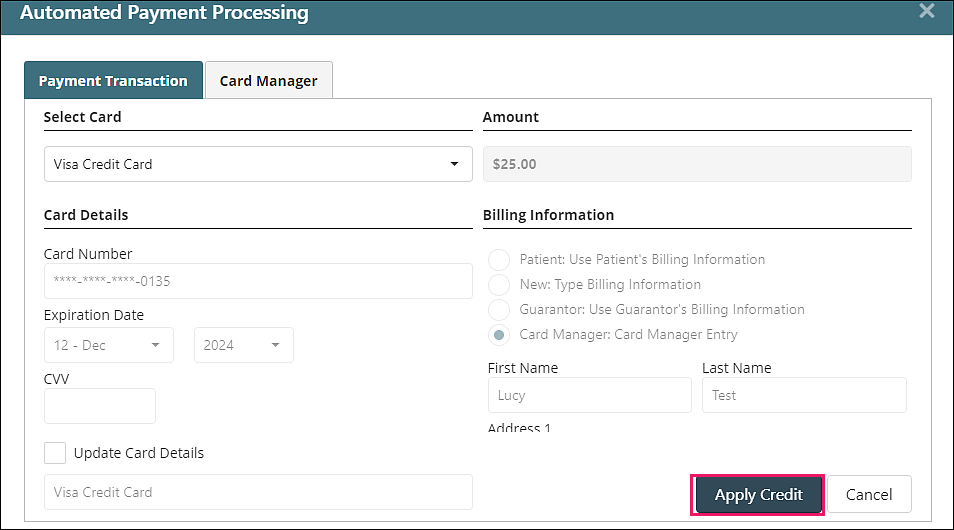
3. The Automated Payment Processing window will open. Select the card to refund from the “Select Card” drop down options or enter a new card in the “Payment Transaction” tab and click Apply Credit.
View/Edit Charges will be updated to reflect the refund. It will show as a Patient Refund and does not need to be separately documented.
DeleteProcessing Patient Refunds
The Patient Refund function in Valant helps practices keep track of refunds given to patients if they paid in error or overpaid. This step is not necessary if a refund is issued back to a credit card through "Apply Credit Card Credit" (see Apply Credit Card Credit section above for that information).
To apply a patient refund:
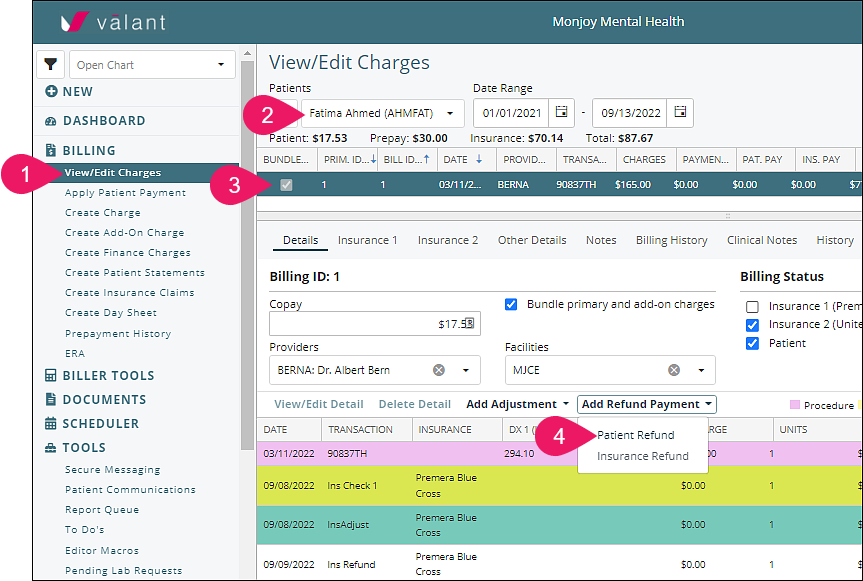
- Click Billing | View/Edit Charges
- Select a patient
- Select a transaction line
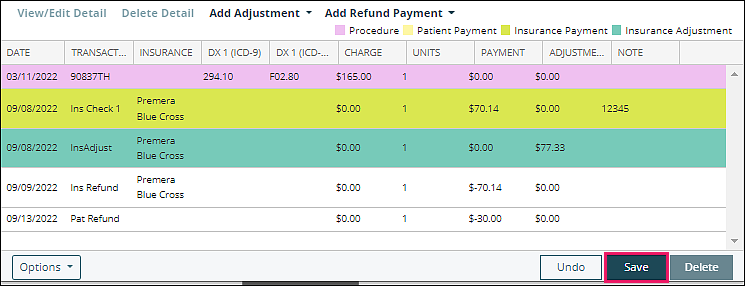
- Click Patient Refund from “Add Refund Payment” drop-down options
In the "Edit Patient Refund" window, enter the refund amount and the date that the refund was applied and click Ok
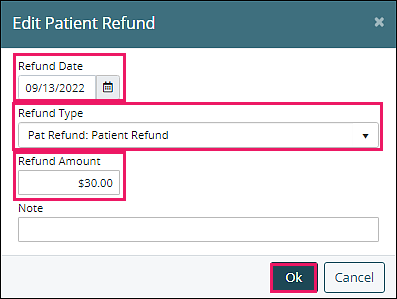
The refund will appear in the transaction details. Notice that the amount appears in the "Payment" column with a negative value. Click Save.
Note: Pre-payments cannot be refunded, they must first be applied to a date of service and then follow the above workflow.
DeleteReceipt Book
Benefits of using the Receipt Book are that it keeps a record of patient payments received (except payments received through the portal) and allows accepting a payment without recording an appointment. All patient payment records are stored in the Receipt Book and a copy of the receipt can be viewed or printed at any time.
To access, click on Billing | Receipt Book
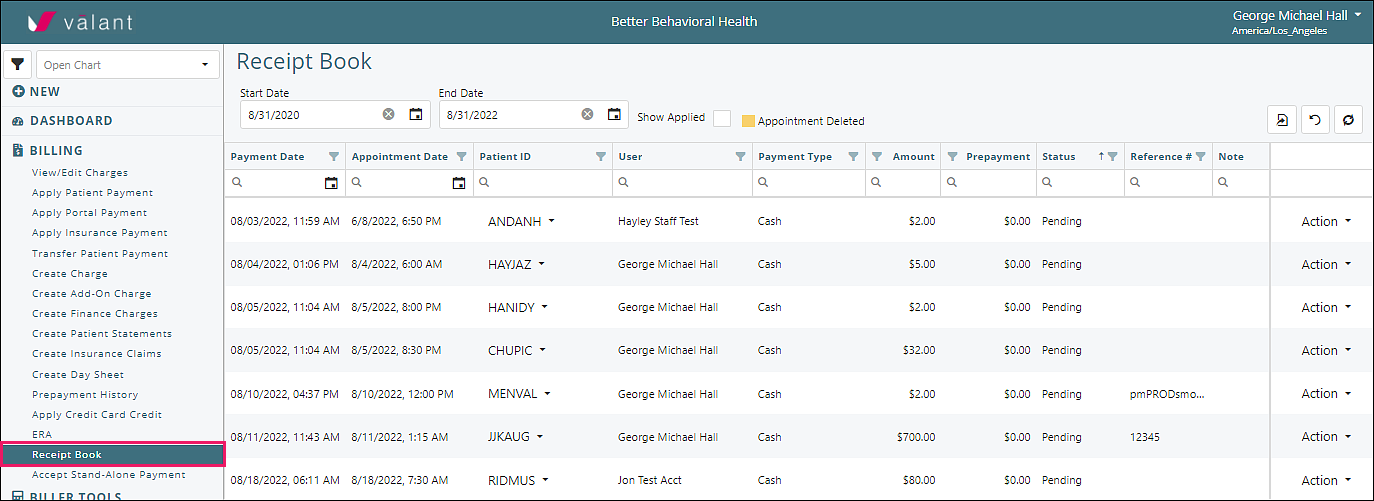
“Show Applied” checkbox, if checked, shows applied data from the past.
Viewed information can be exported by clicking on the export icon on the top right.
The columns can be adjusted to desired order. Data in any column can be filtered to see relevant details.
Status Column
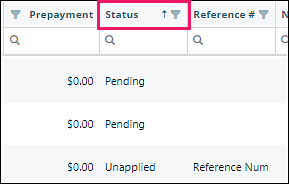
Status Column options:
- Pending: payments that will be automatically applied when charges are processed in the PTQ
- Applied: payments that have been manually or automatically applied to charges
- Unapplied: payments that will need to be manually applied to charges
The settings in Persons & Institutions | Practices | Preferences tab under Billing determine what shows in the status column.
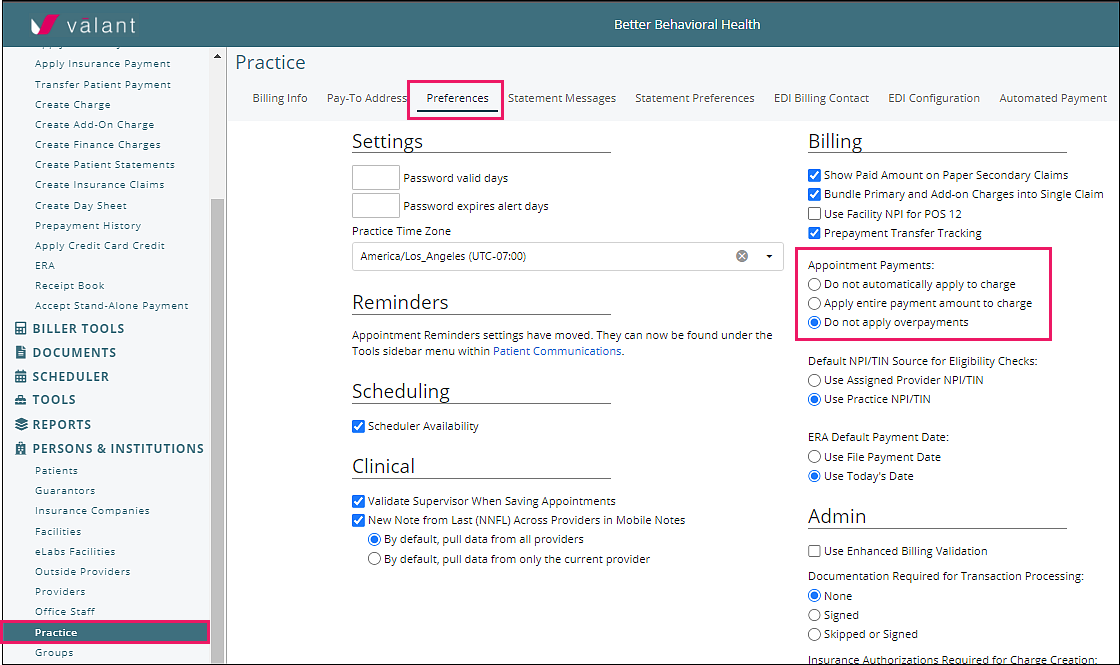
Appointment Payments:
- Do not automatically apply to charge: becomes a fully manual process if this is selected
- Apply entire payment amount to charge: if the payment is more than what is owed, this will create an overpayment which will be automatically applied when the charge is processed through the PTQ
- Do not apply overpayments:
- if the payment is more than what is owed, the payment will remain in an unapplied status and the overcharge can be manually applied
- if the payment is not more than what is owed, the payment will have an applied status
Action Column
In order to complete any task, click on Action:
Accept a Stand-Alone payment for the Receipt Book:
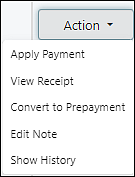
- Apply Payment: selecting this option manually applies the payment
- View Receipt: opens a pdf of the receipt for viewing and printing
- Convert to Prepayment: manually converts to prepayment
- Edit Note: opens the note field for the payment
- Show History: displays all activity in the payment
When receipt book is on, Save and print receipt does not save the receipt in patient documents, need to select “View Receipt”
Accept Stand-Alone Payment
The Accept Stand-Alone Payment function creates the opportunity to collect payments without having processed a charge in the PTQ (e.g. recording an appointment from the calendar prior to accepting the payment makes the accept payment option unavailable).
“Accept Stand-Alone Payment” is used rather than “Apply Patient Payment” when there is no charge to apply the payment to.
Click on Billing | Accept Stand-Alone Payment
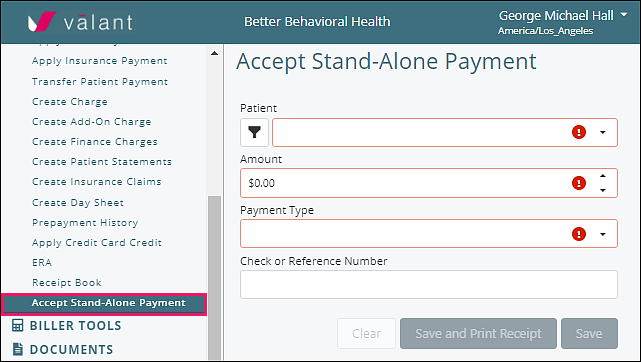
Enter the relevant information and click Save or Save and Print Receipt.
A record of the payment will be stored in Receipt Book.
Delete