
Prepayments will allow monies to be accepted and assigned to a specific patient prior to a charge being created. This can be useful for a new patient when a billable charge has not been created or a patient wants to pay in advance for a block of visits.
Accepting a Prepayment
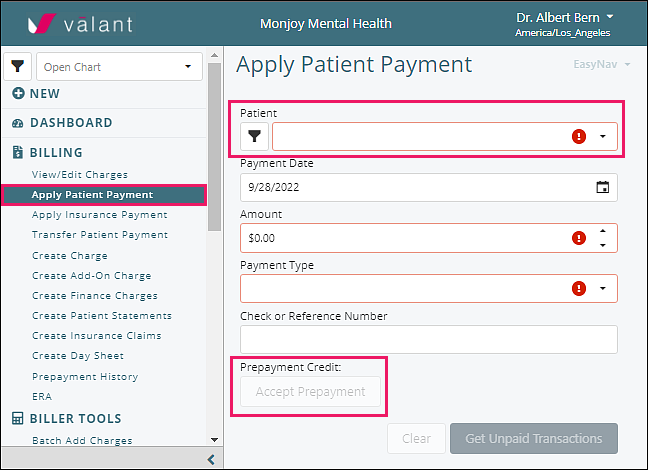
Collecting a Prepayment can be completed with the apply patient payment in the Billing menu, or by right-clicking on an appointment in the scheduler and clicking Accept Prepayment.
Navigate to Billing | Apply Patient Payment
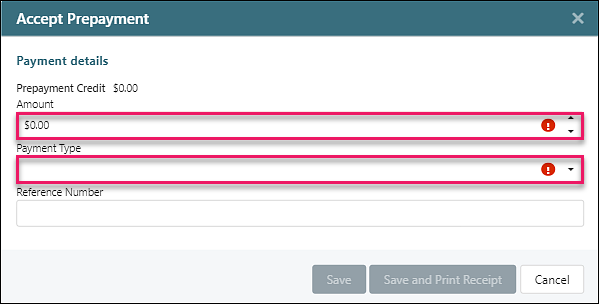
Select a patient and click Accept Prepayment which opens a separate window
- Enter the payment Amount
- Choose the Payment Type from the drop-down list
- Reference Number (optional): check number or CC authorization number
- Click Save or Save and Print Receipt
The following image illustrates where the user can see the patient's prepaid amount.
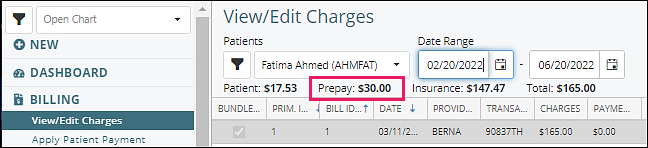
Remember to apply the pre-payments to the appropriate charges as soon as possible.
Apply Prepayment
- Click Billing | Apply Patient Payment
- Choose the patient that received the service from the Patient drop down list
- Indicate the date the payment is being applied in the Payment Date field which is defaulted to today's date
- Enter the payment Amount
- Choose "Pre-payment Transfer" from the Payment Type drop down list
- Click Get Unpaid Transactions
![]()
This will open the "Select Prepayments to Apply" window. Select the prepayment to transfer from and click OK
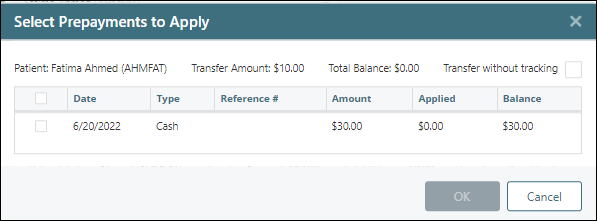
Note: "Transfer without tracking" checkbox means it will only post the prepayment transfer unattached in Prepayment History.
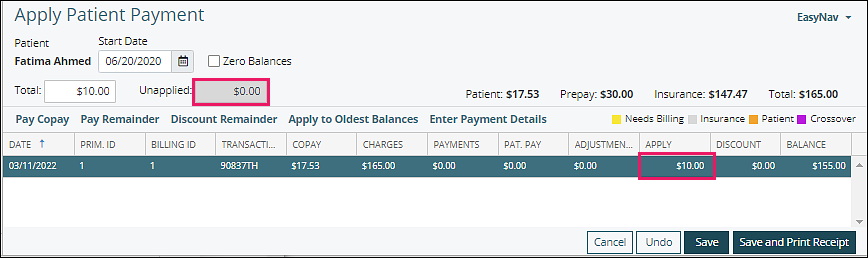
The “Apply Patient Payment” window will open and allow a user to apply the prepayment to specific charges.
Enter the desired amount into the "Apply" field for each charge that the prepayment is being applied to (be sure the "Unapplied" field reads "$0.00") and click Save or Save and Print Receipt.
Run the following report to check all pre-payment activity:
Click on Reports | System Reports | Billing | Pre-payments